Sweet & Soft Sourdough Hawaiian Rolls
I never invent recipes or bake stuff for the sake of blogging or posting on social media. My contents are purely, what I make for us to eat on a daily basis. All the food and bakes that I post on IG or on Facebook get eaten right after the photo shoot ('during' in some cases) even the trial batches. Most of the time, the motivation is either finding some beautiful produce or a special request or the necessity to use up leftovers. I am an advocate for "zero waste". So the motivation behind this recipe is half a can of pineapple chunks that was sitting in the fridge. (The other half was used in a Thai Red Curry)
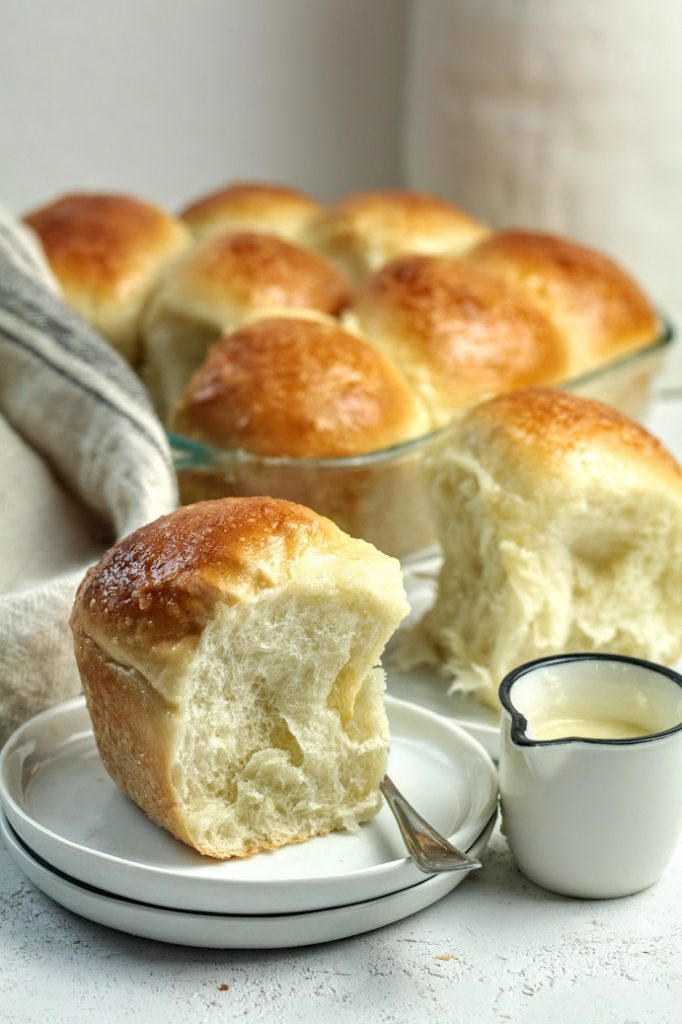
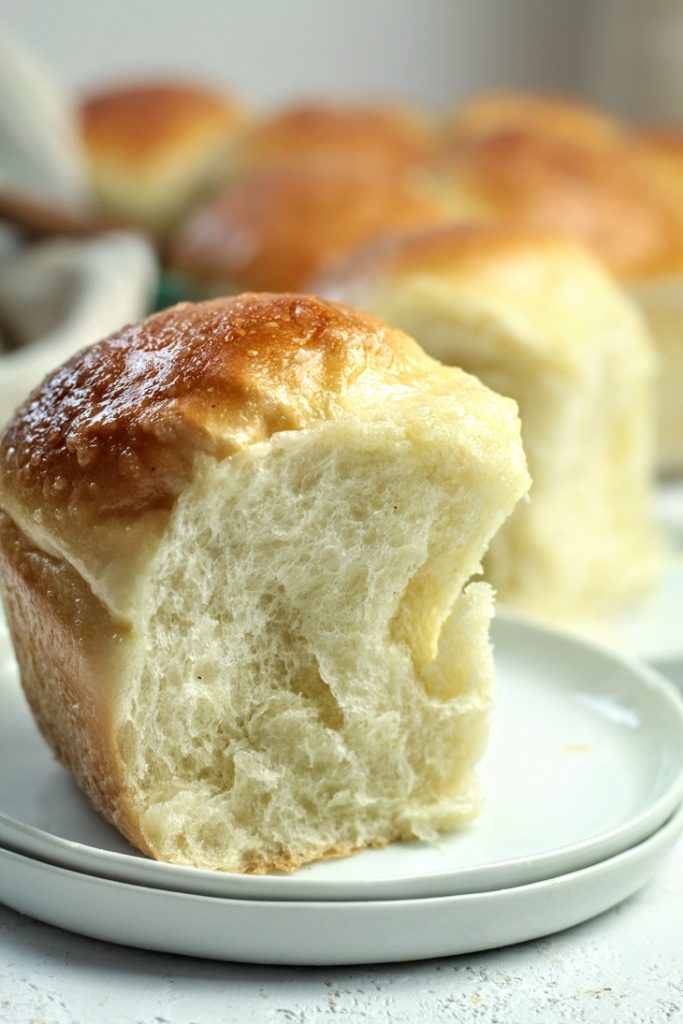
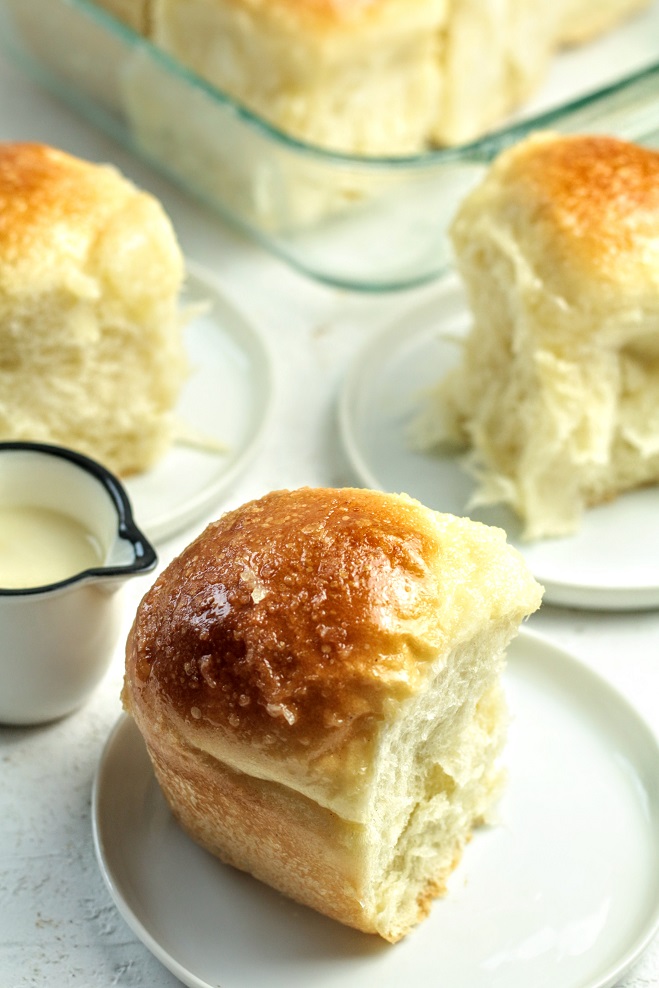
We love crusty bread at our house. Even the burger buns got to have a bit of a bite to it! But occasionally, we like to munch on soft, sweet, indulgent stuff too. When I want soft, I go all in. This recipe is one of those, where you will end up with a super soft, ultra light, melt-in-your-mouth kind of crumb.
See for yourself!!! Check the video below
Supper soft buns
Pineapple juice:
The brand of canned pineapples I used, has pineapple chunks in 100% pineapple juice. So I used this juice from the can and later some chunks too. I find the juices contain more flavor than the actual chunks. (I grew eating real, juicy, tropical pineapples, so obviously, I don't think the canned ones can even come close..but it is convenient ) Feel free to use any pineapple juice you like for the recipe or juicing a ripe pineapple is an option too.
I am sure most of you have made a roux before or at least have heard of it. A traditional roux is flour cooked in oil. This is used to thicken sauces like béchamel. There is also a technique where you use water and flour to make a thick roux. And this is used to make soft bread and buns. You can replace water with milk to increase the richness. That is exactly what I did here. I made a roux with flour, water and milk (1:1:1) to make these rolls extra soft.
You can completely skip this step and still get perfect soft Hawaiian rolls, but this is my little twist to getting them irresistibly :) soft
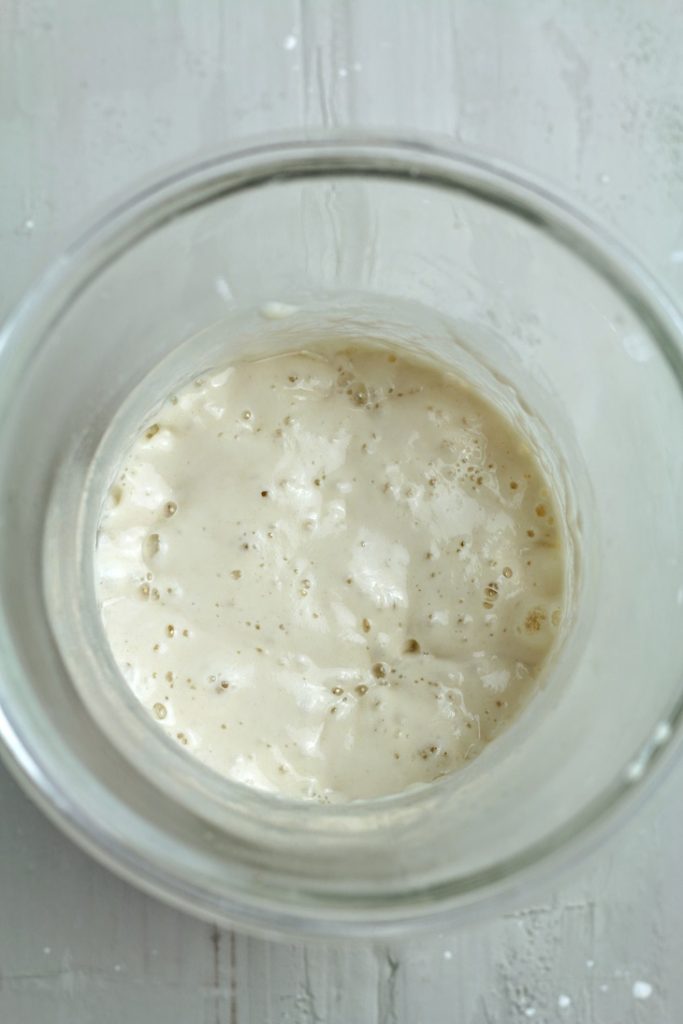
You need a fed, ripe sourdough (100% hydrated) starter to make this. So make sure to feed it ahead of time and have it ready.
Remember! A well fed (refreshed) starter ( that is not starving) is the key to less sour flavor in the end product!
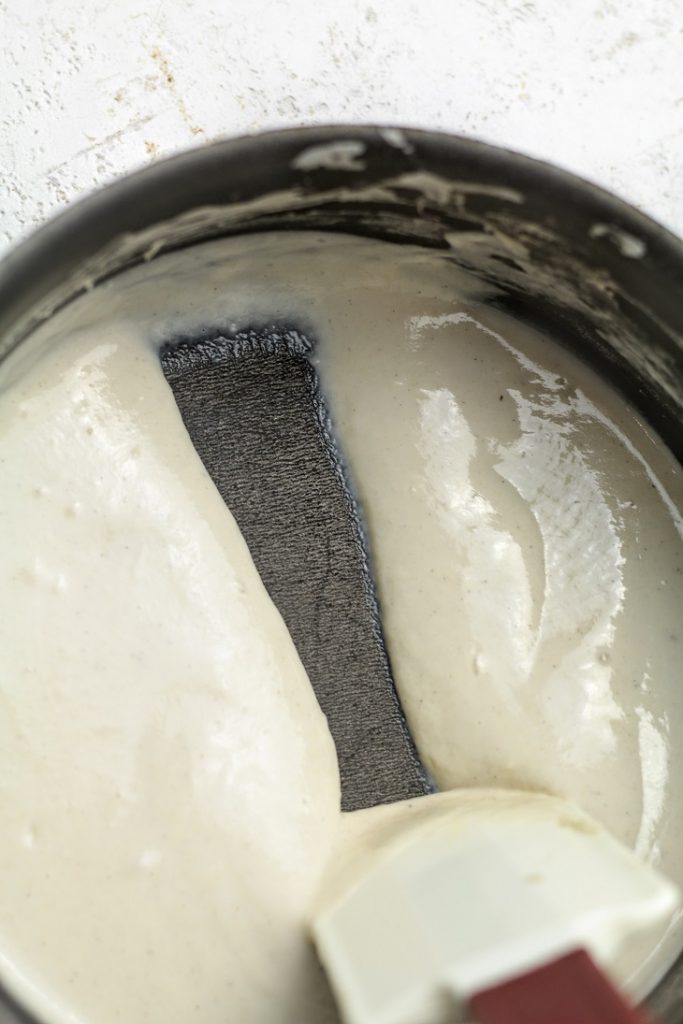
Let's make the roux next. Mix 1/2 cup flour(use all purpose or a mix of all purpose and bread flour) with 1/2 cup water and 1/2 cup milk, in a heavy bottom saucepan. Whisk to combine and get rid of all lumps. Cook this on low heat whisking slowly, for about 5 minutes. The mix will start to thicken. When you can draw a path on the bottom (like shown in the picture) it is ready. This consistency is closer to that of a pouring custard.
Take off the heat and pour into a dish. It will continue to thicken further as it cools.
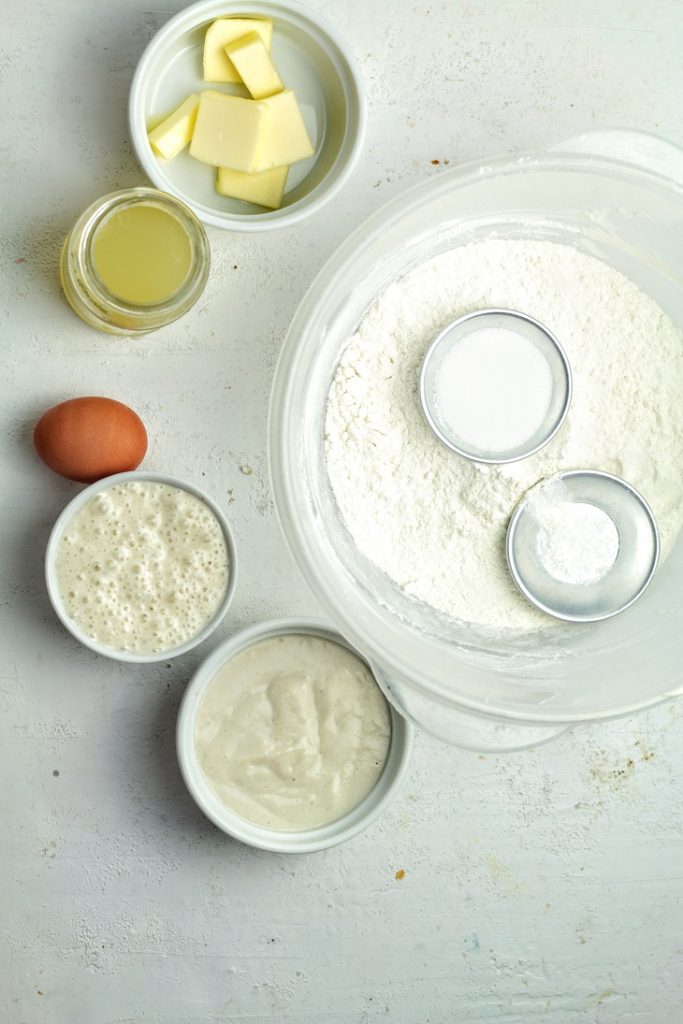
Weigh/measure all the ingredients and have them ready.
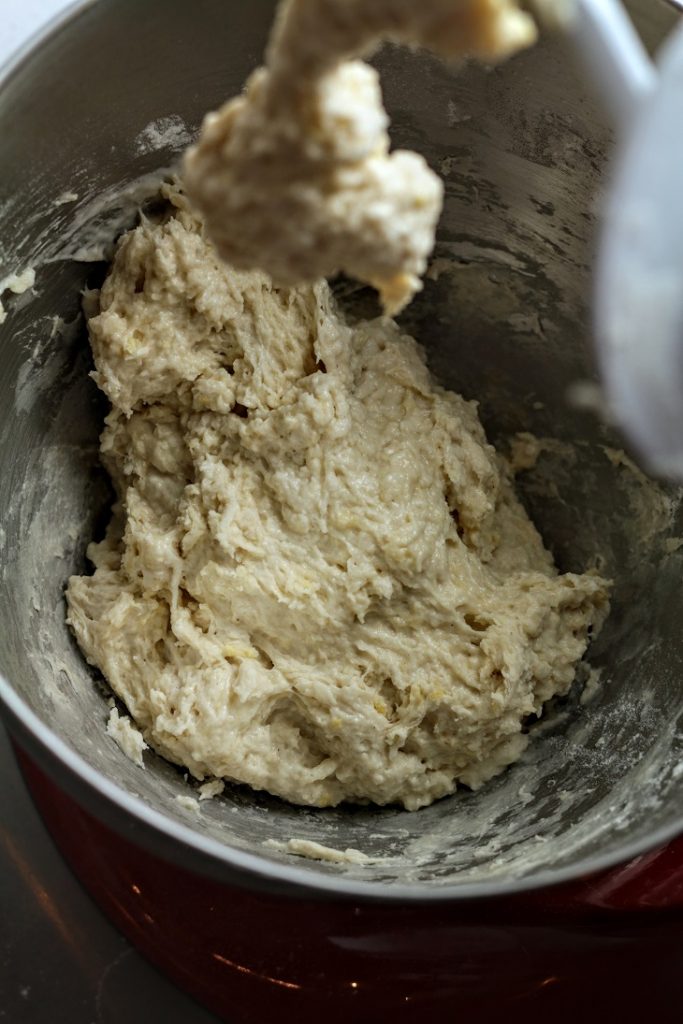
Mix everything except the butter using a stand mixer. It is very sticky at this point and just mix until everything is kind of mixed and cohesive.
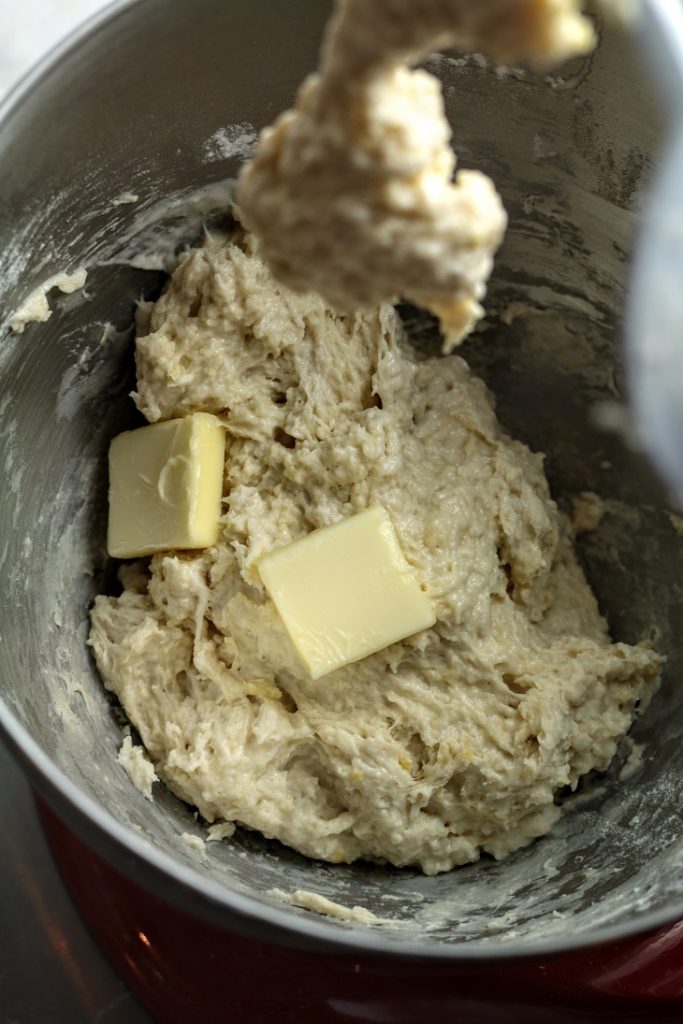
Add butter, 1 or two pieces at a time and mix until all the butter is incorporated. You will have to aid this process, with a spatula. Scrape the sides and push butter in the dough to encourage mixing.
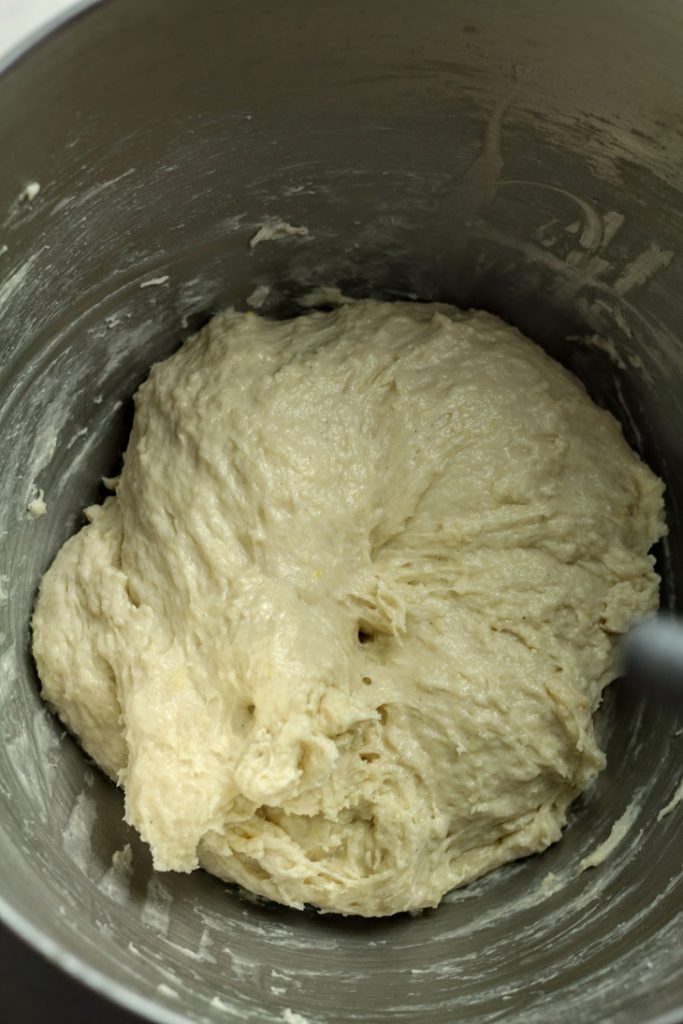
Once the butter is fully incorporated, the mixture will look slightly glossy and yet sticky. Let this sit/rest for 5 minutes. And then mix on medium-low speed ( speed 2 on a kitchen aid) for a bout a minute. You will start to feel the resistance.If the dough is too sticky let it rest for 15-30 minutes before mixing.
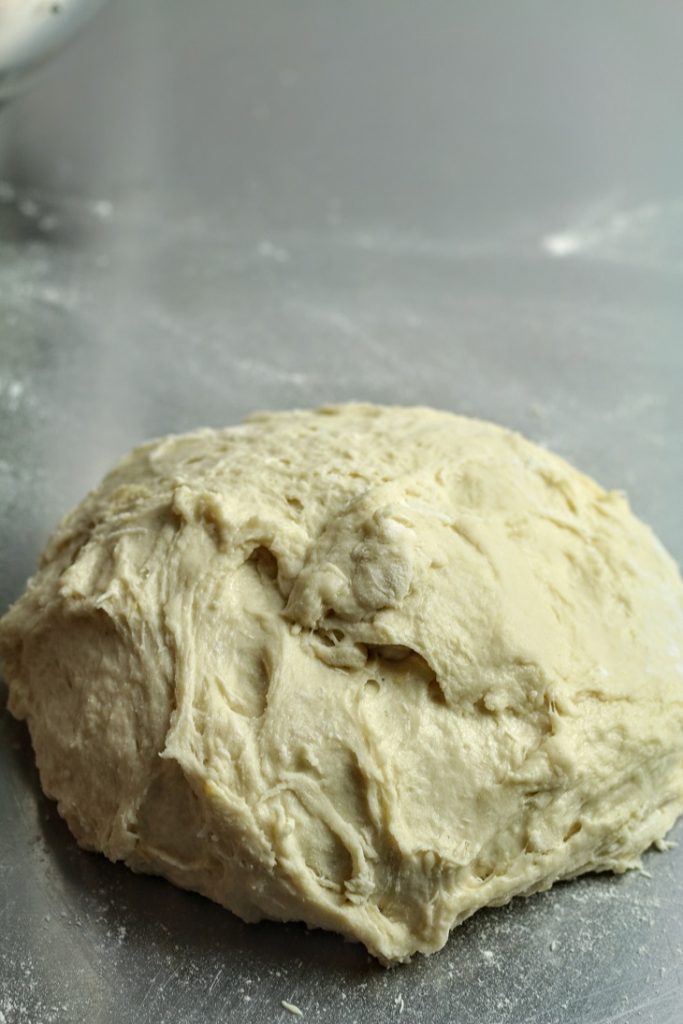
At this stage, bring the dough out on to a floured surface. It will be sticky, but if you flour your hands, you should be able to handle it pretty easily. Use slap and fold to bring the dough together. Every slap and fold will change the dough. Use a bench scraper to release and gather dough as you go. Use flour to stop sticking.If you don't want to handle the sticky dough, use the mixer with hook attachment and mix for 10 minutes of until you get a smooth dough.
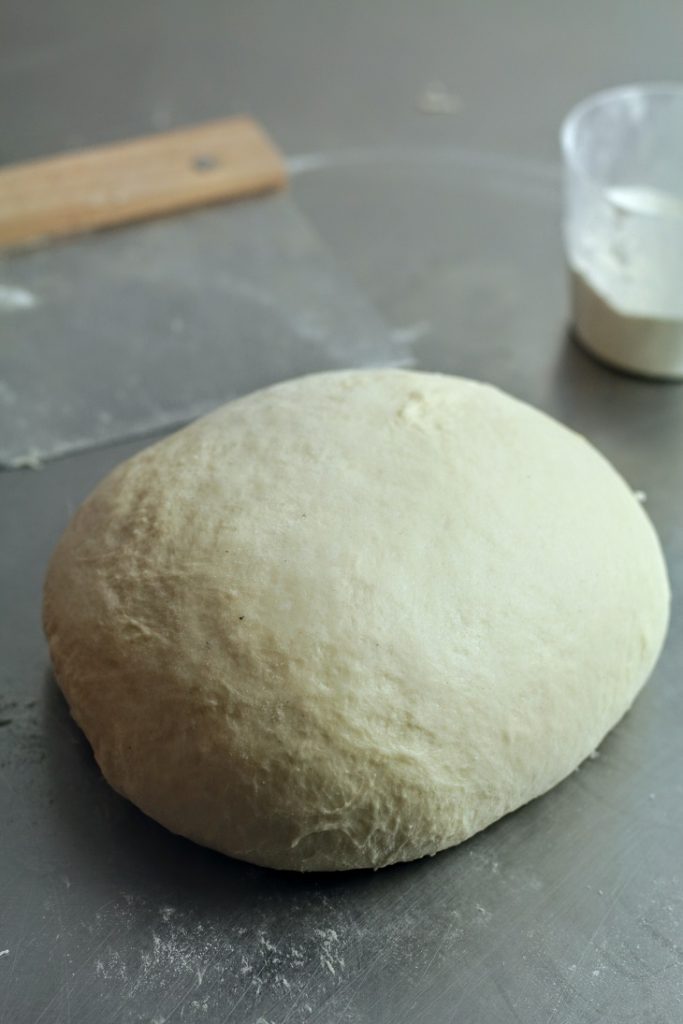
The dough should look like this, after about 10-15 slap and folds. It is still slightly sticky on the inside, but fairly smooth and less sticky on the outside. Very soft and would spread out, if left for too long.
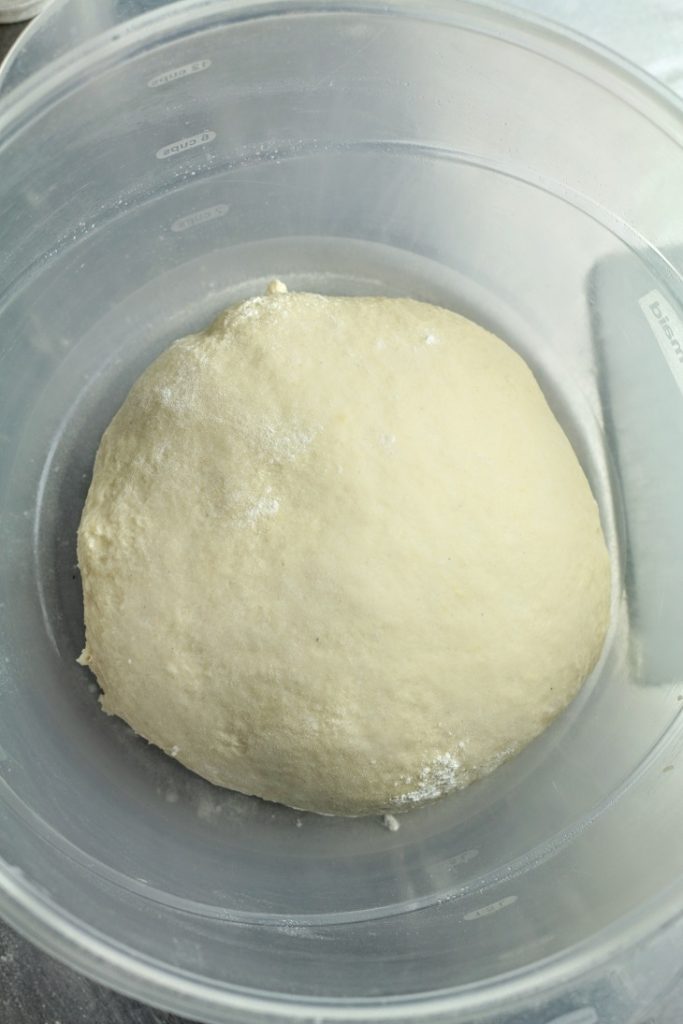
Place the dough in a lightly greased bowl, cover and bulk in a warm place. I create a warm place in my oven by placing a bowl of boiling water inside. (change water with fresh boiling water every hour)
It is roughly 90 °F (32 °C)
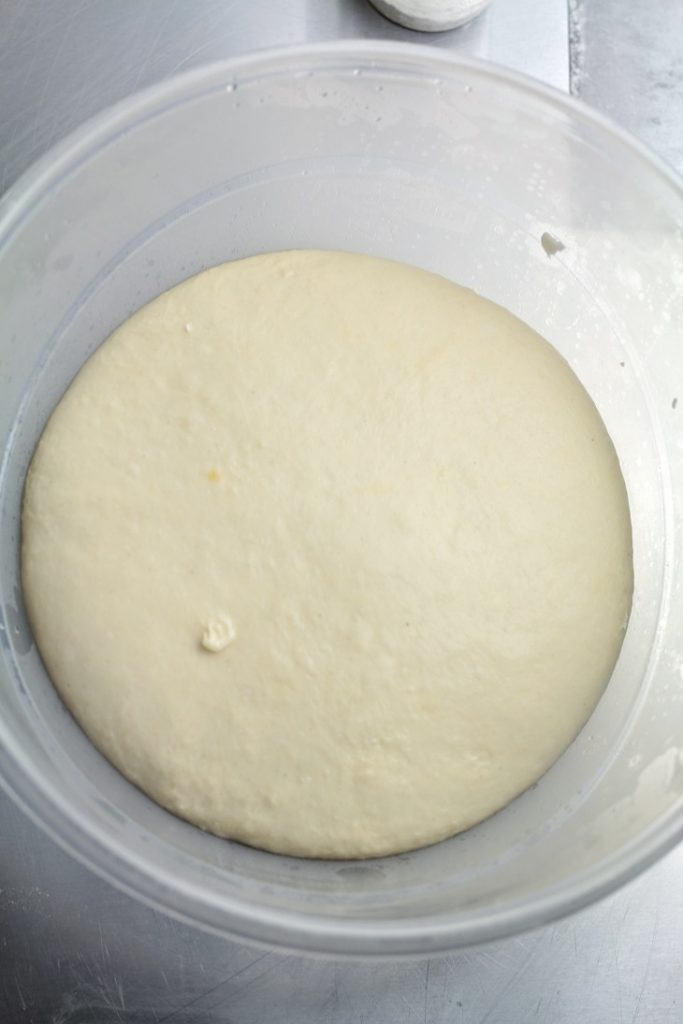
This is after 3.5 hours in to bulk fermentation and the dough has grown 1.5 times its original size. I would stop fermenting here and going to retard this dough ( for extra flavor)
For same day Bake: leave the dough in the warm place for another hour or 1.5 hours until it is doubled in size and continue from dividing onward.
Use a tall container, so you can see the growth easily. I always eyeball.
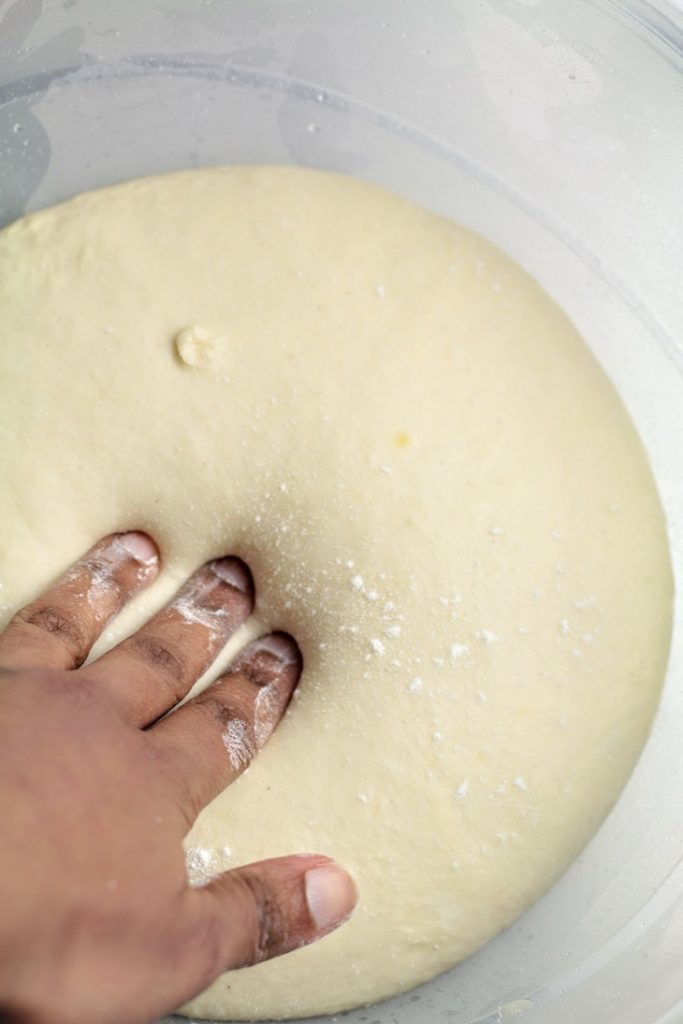
See how plump the bulked dough is. The dough is not as sticky as it used to be.
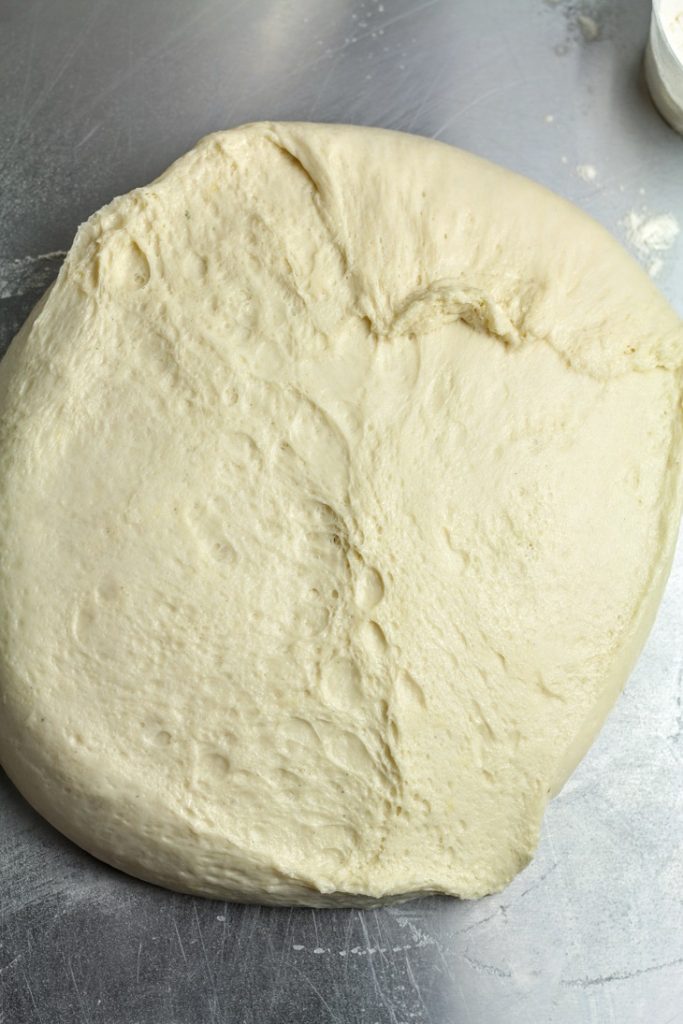
Tip the bulked dough on to a floured surface. Notice the sponge like texture.
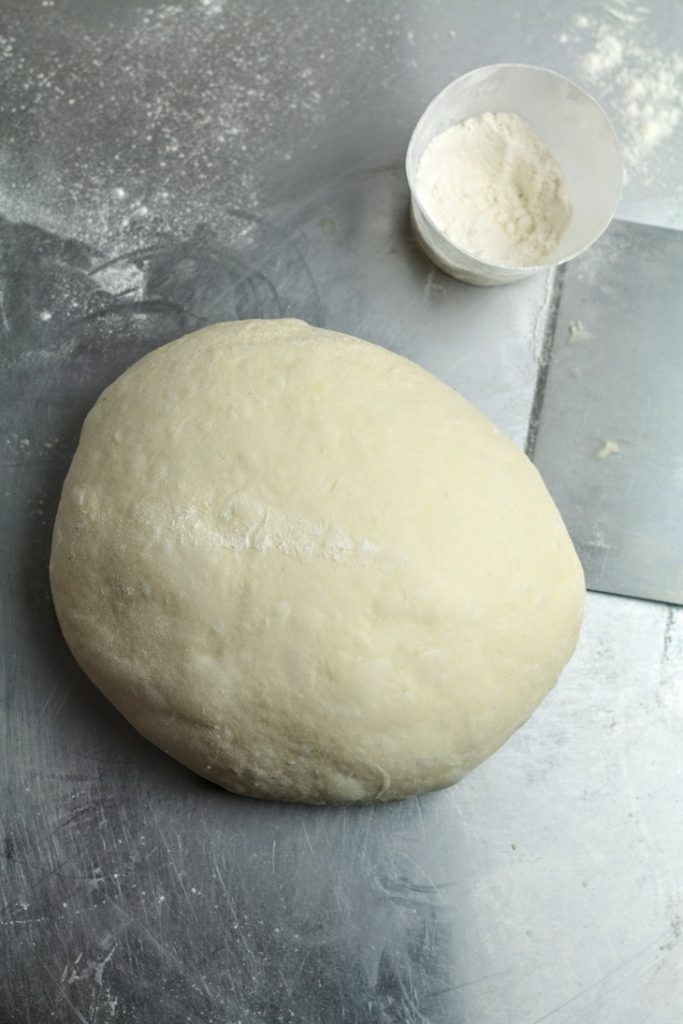
Shape the dough to a tight ball, releasing some of the air trapped in. You will notice the dough has gained strength and elasticity. It is not as sticky anymore and is very soft and pleasant to handle.
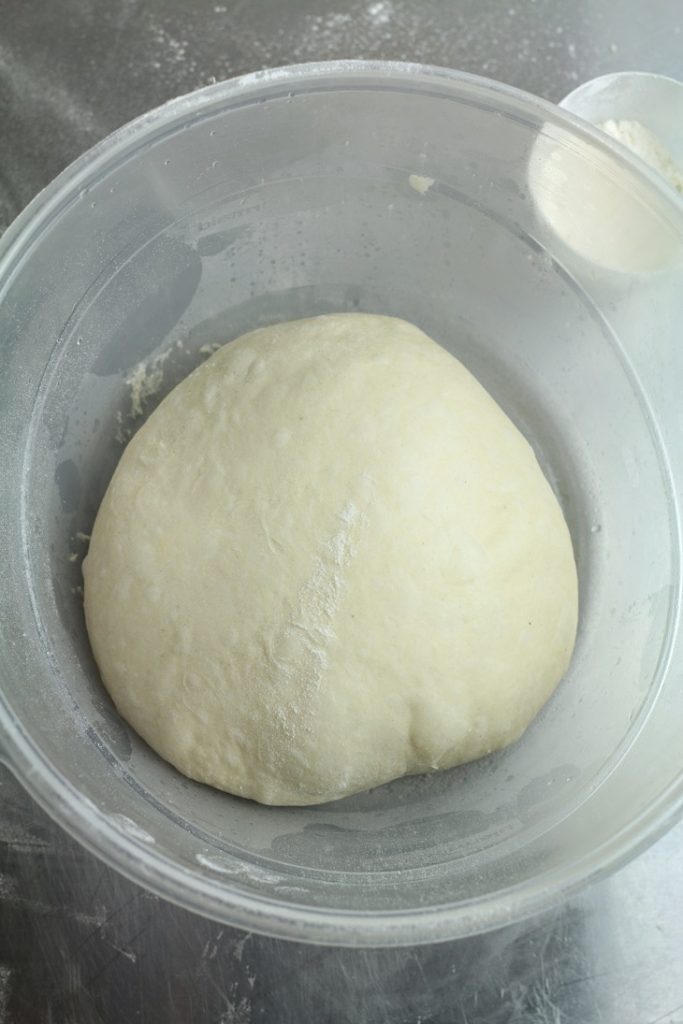
Place the dough in a plastic container and close the lid tightly. Place this in the refrigerator to slow-ferment (retard).
I did retard for 18 hours. Anywhere from 10 - 20 is fine.
Retardation might adds a bit of sourness, meaning the less time you retard, the less sour it will be. So you can stretch the bulk and shorten the retardation to balance out
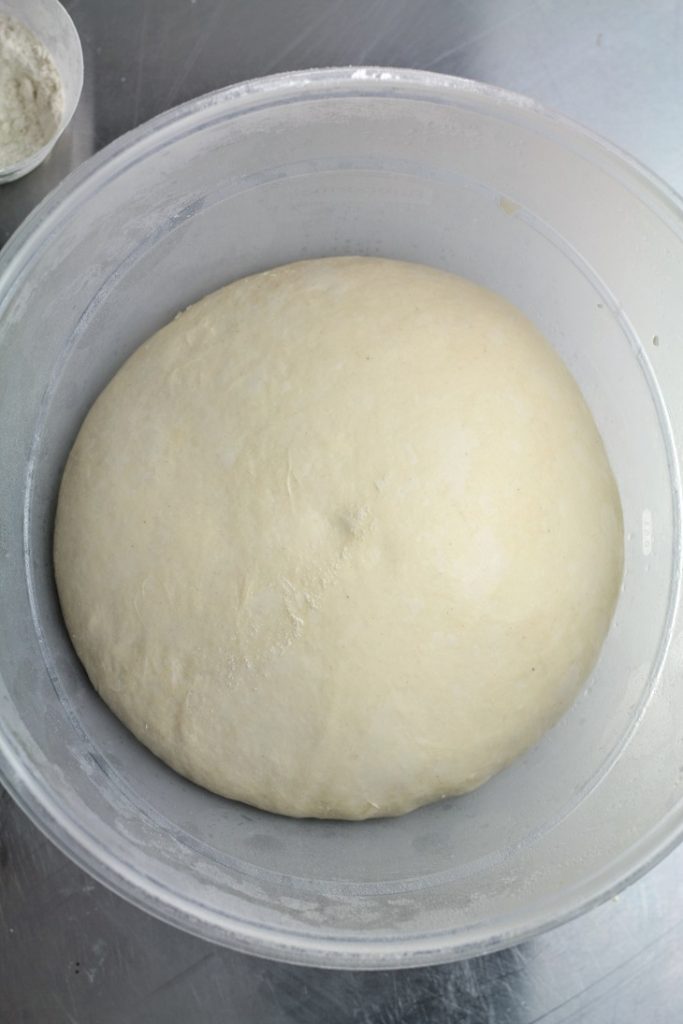
Retarding will slow down the fermentation, but there will still be a considerable rise. Let this dough soften up a bit, so we can shape. Took 3.5 hours at 90 °F (32 °C)
Leave at room temperature for not more than 20-30 minutes. Do not let it thaw completely, a colder dough is much easier to shape.
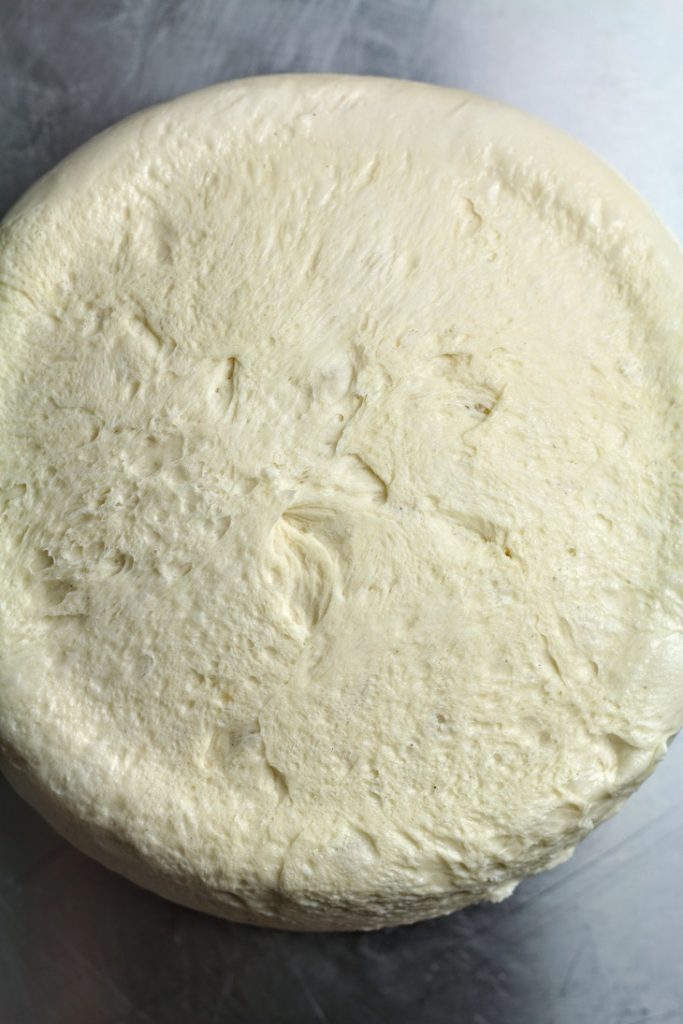
Tip the container and drop the dough on to a lightly floured surface.
I posted this picture to show you how the bottom of the dough show signs of fermentation, so you will know what to look for.
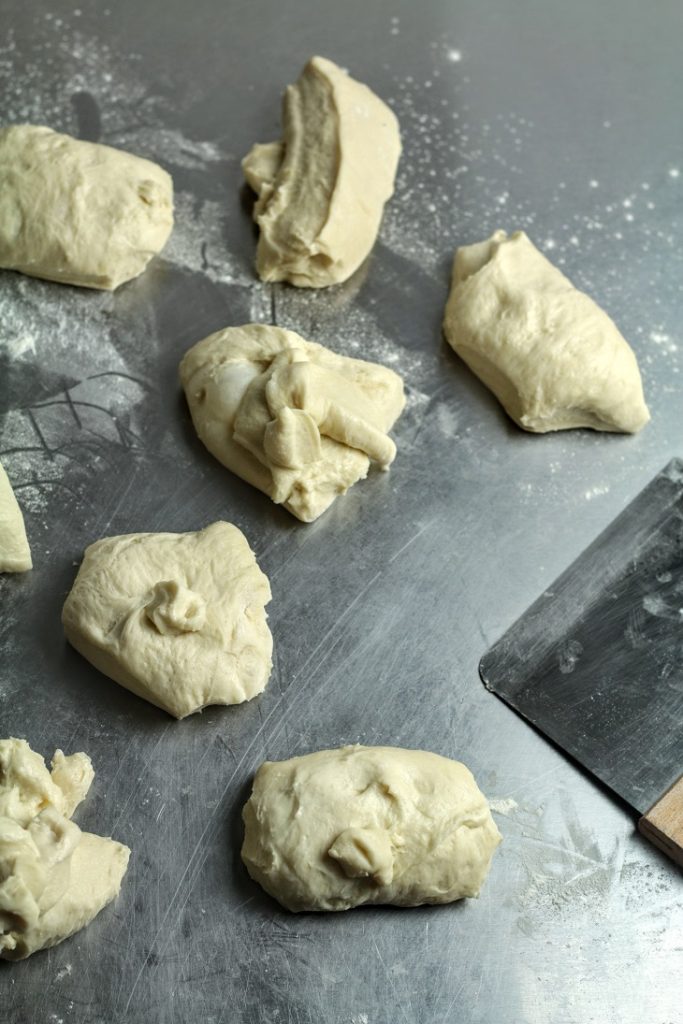
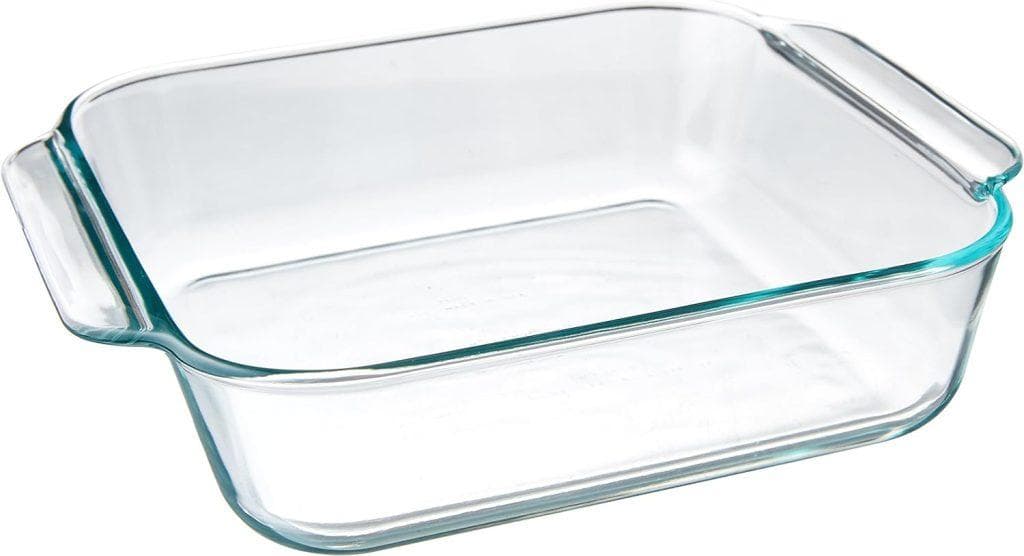
Divide the dough in to 9 (3 by 3 rows) or you can do 12 for 3 by 4 rows), depending on the baking dish you use. I'm using my 8. 1" X 8. 1" X 2. 1" (2 quart) Pyrex dish.
To make dinner rolls divide into 60g (or 58g) portionsIf your dough is too sticky, place in the fridge for 2-3 hours or until it firms up so it's easier to handle
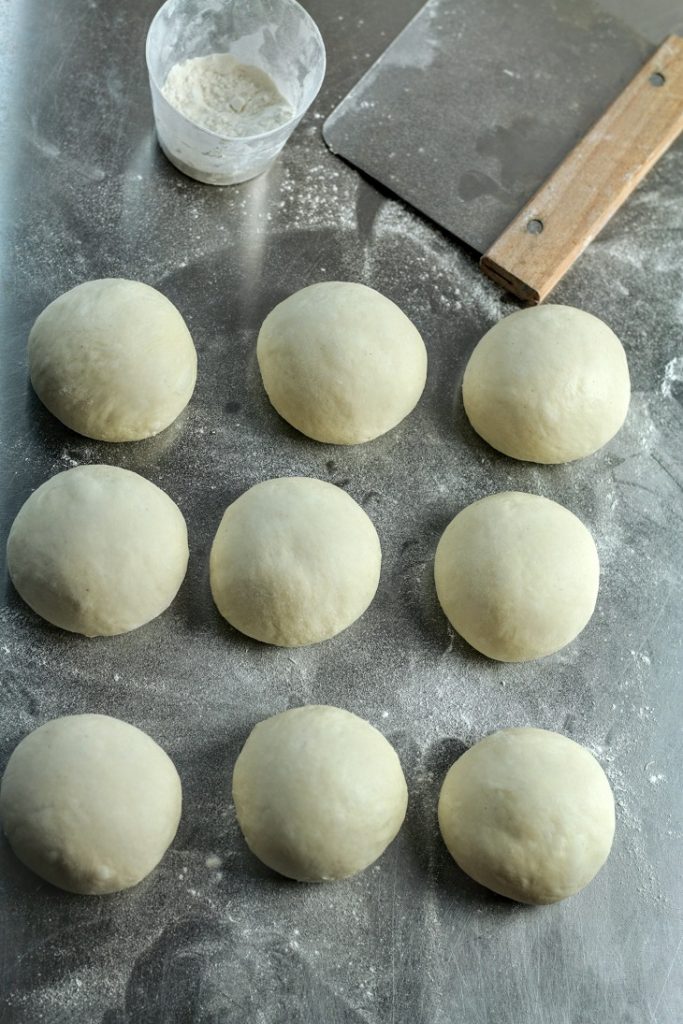
Shape them into nice, tight, dough balls. Just like making other rolls.
Video of shaping buns
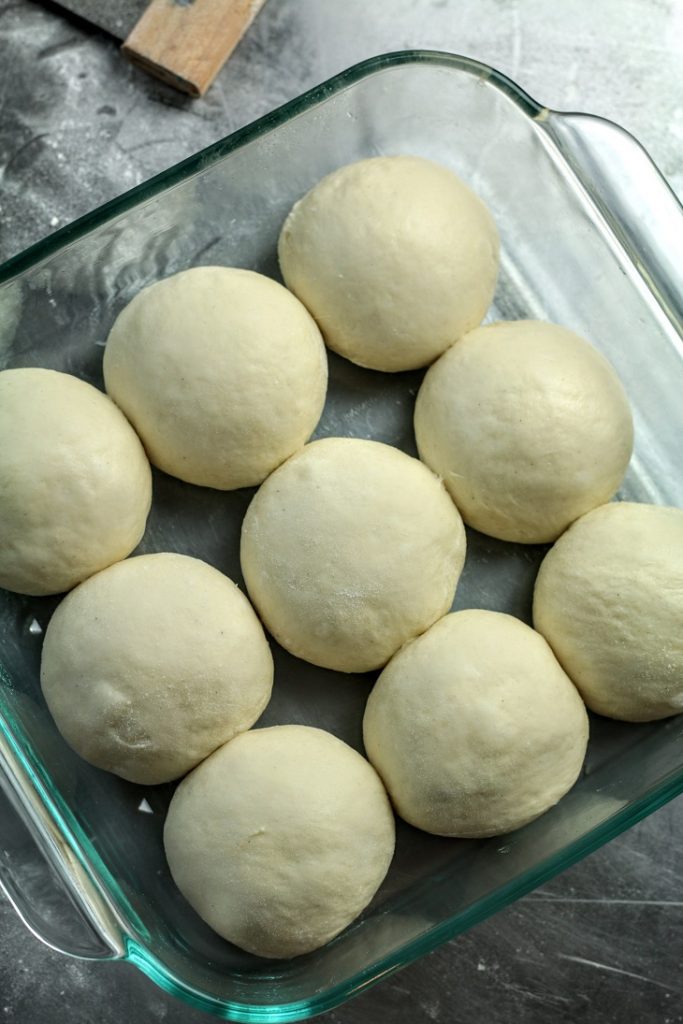
Place them closer to each other, so they will rise upwards, giving the rolls a great height. This will keep the crumb softer too.
8. 1" X 8. 1" X 2. 1" (2 quart) Pyrex dish.
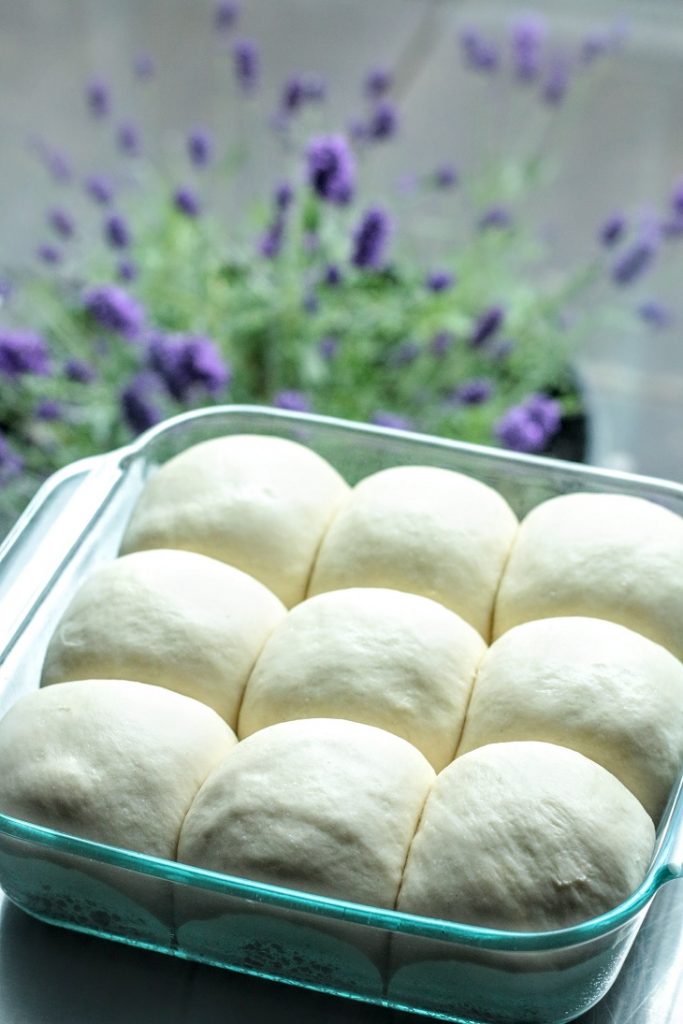
Cover these and leave in a warm place until doubled in size.
Roughly about 3 hours at 90 °F (32 °C) but check every half an hour to see how they are doing
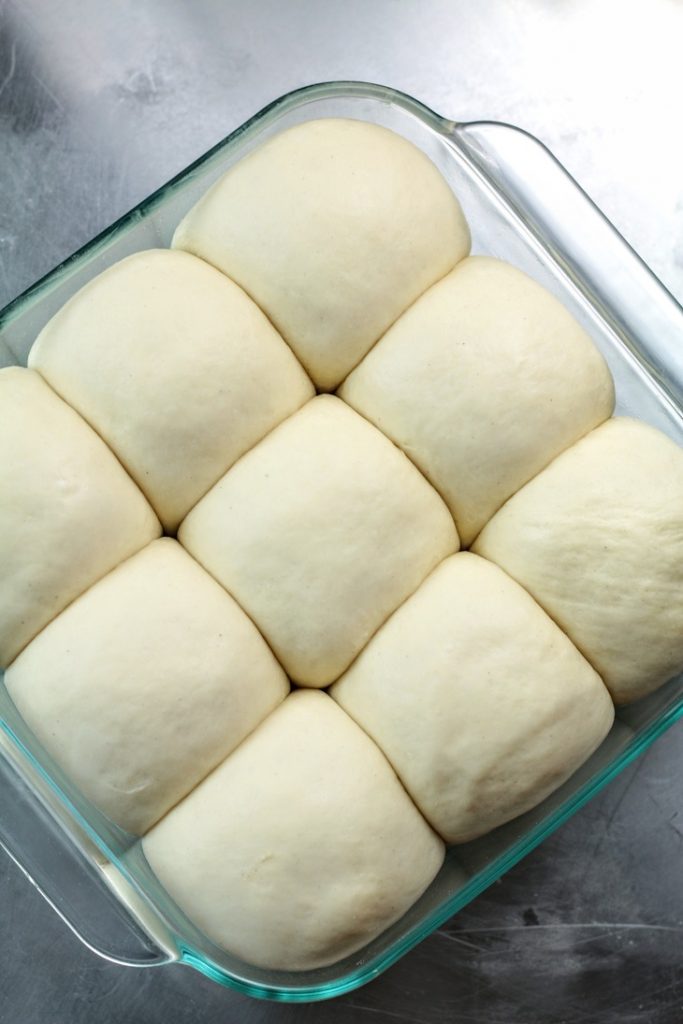
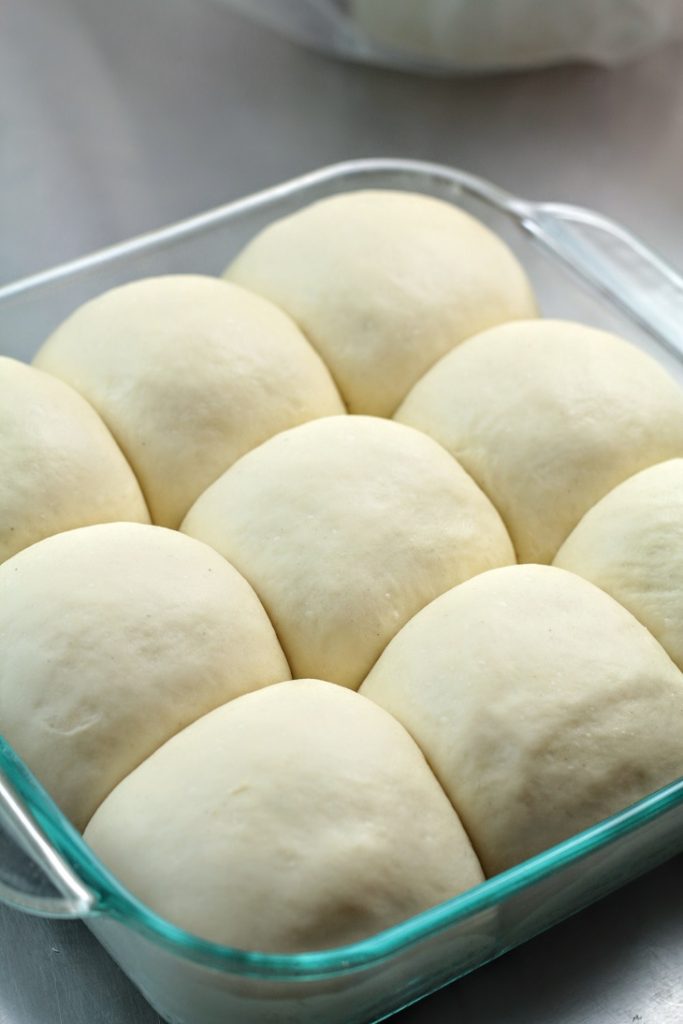
A view from an angle, so you can see how high they are. They will be higher with the oven spring.
Preheat the oven to 350 °F (170 °C)
Convection 300°F (150 °C)
Lightly egg wash the top and bake for 20 - 30 minutes. 20 minutes is often enough, unless your oven is like mine (doesn't heat up evenly/conventional)
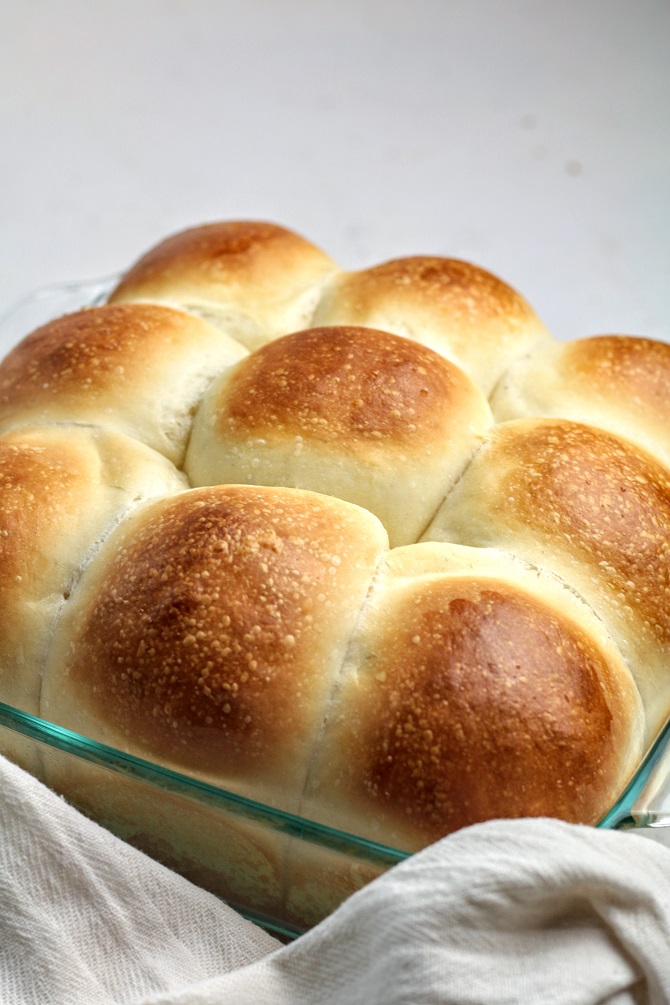
Have your glaze/syrup prepared, while the buns are being baked.
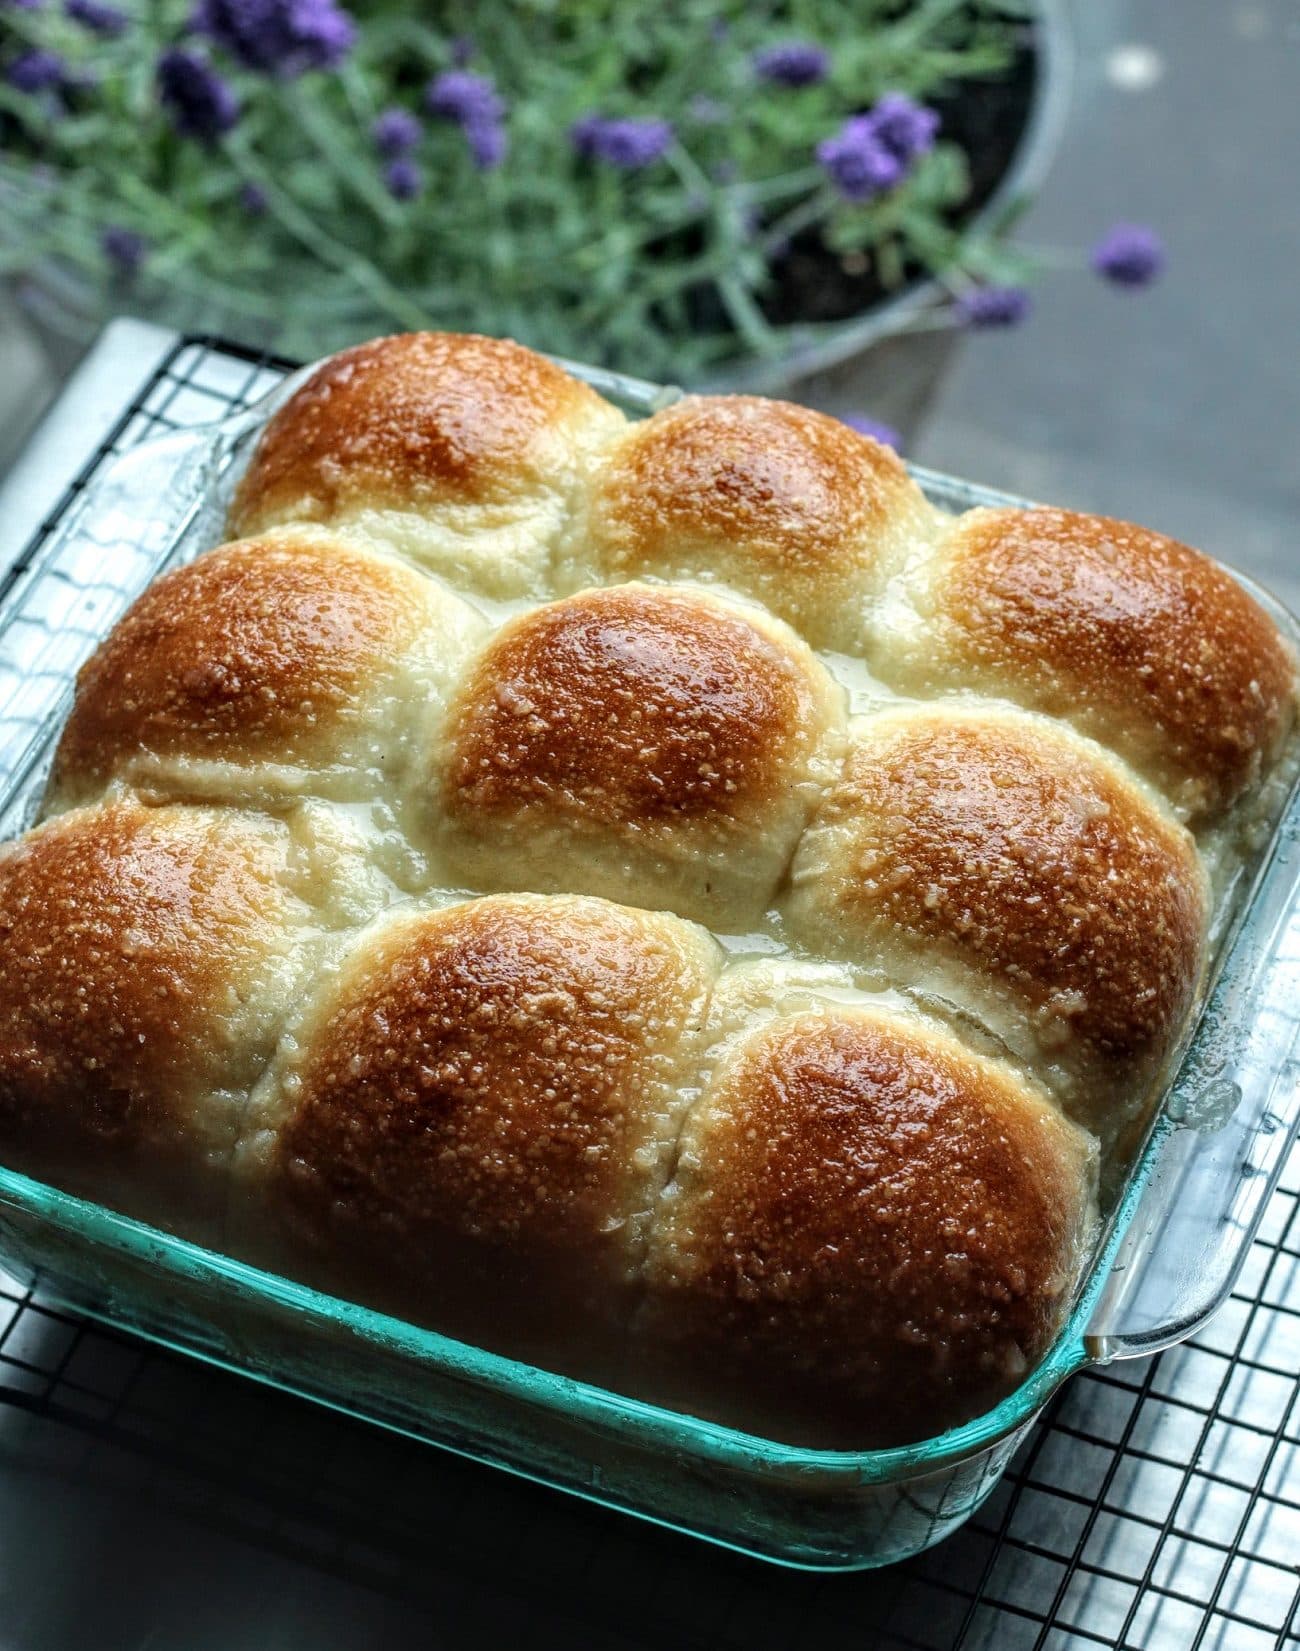
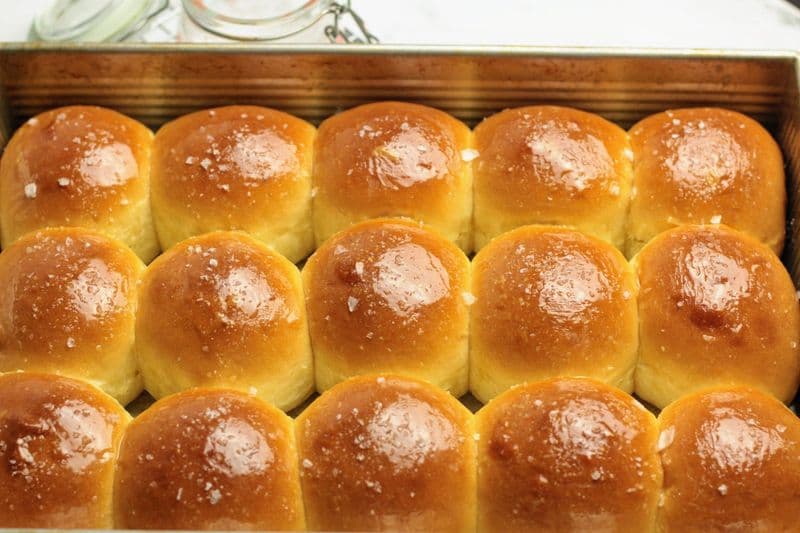
Once the tops are golden brown like this, it is ready to come out.
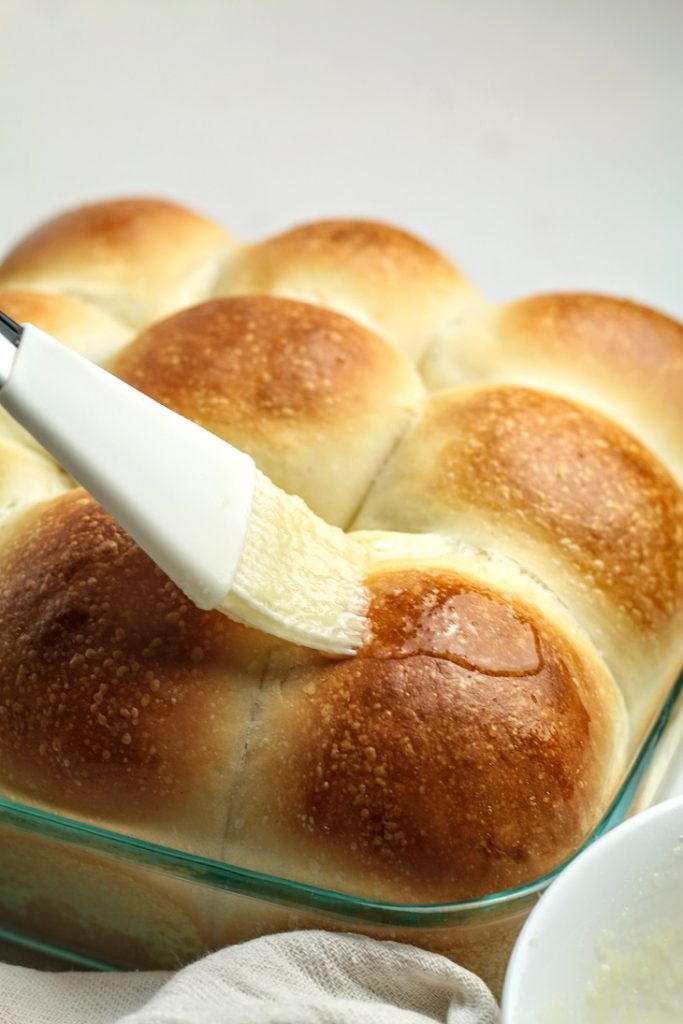
Apply the glaze while it is still hot. Brush the top with syrup generously and leave to cool. This prevents the rolls from drying out, gives extra pineapple(tropical) flavor, adds extra sweetness and moisture too.
You can use a normal sugar syrup instead of this pineapple coconut syrup.
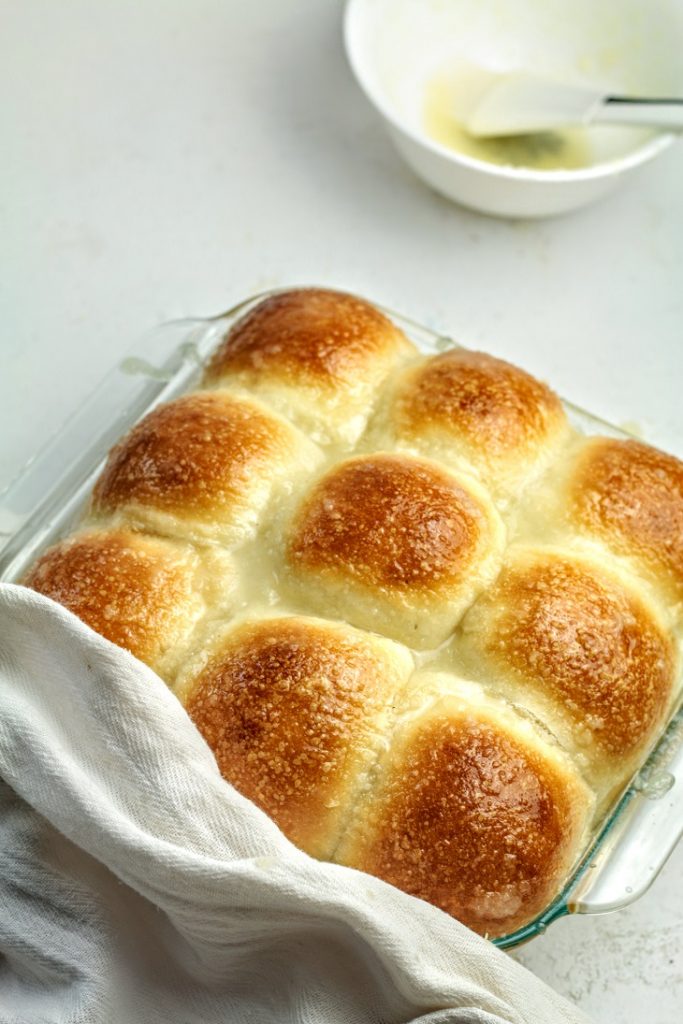
The syrup will be absorbed as it cools. Serve warm.
Skip the syrup if you plan to make sliders with these buns
Shop the Ingredients
Sweet & Soft Sourdough Hawaiian Rolls
Ingredients
Method
To make the starter
- 1
Feed 1 tbsp of culture with 50 g flour 50 g water and let it ferment
- 2
Or use 100 g of your normal fed starter. Roughly 100% hydrated( anywhere above 80% is fine)
To make the Roux
- 3
Place all the ingredients in a heavy bottom saucepan and whisk until all the flour is dissolved and a smooth mixture is achieved
- 4
Place on low heat and cook whisking slowly until it thickens. Might take about 5 - 7 minutes.
- 5
It should be the consistency of pouring custard. Check the image above, on how to check this by dragging the spatula across the bottom of the saucepan
- 6
Once it has thickened, removed from heat and leave aside to cool. It will continue to thicken further as it cools
To make the dough
- 7
Into a bowl of a stand mixer, add the flour, salt, sugar and mix lightly
- 8
Add the starter, the roux (cooled completely) the egg and the pineapple juice and start mixing slowly
- 9
When everything is incorporated, add butter a bit at a time and mix until butter disappears. Continue until all the butter is added
- 10
You might have to scrap the bowl and use either your fingers or a spatula to encourage the butter to blend in
- 11
Once the butter is added, the dough will look slightly glossy.
- 12
Leave the dough to rest for 5 minutes
- 13
Mix on medium-low speed ( speed 2 in kitchen aid) for about 3 minutes, scarping down the bowl as necessary
- 14
Use a little flour on the wall of the bowl to encourage the dough to release from the sides
- 15
The dough will be sticky, but will feel strong and elastic ( feel the resistance on the machine)
- 16
At this stage, bring the dough on to a lightly floured bench and use slap and fold to bring it together
- 17
Use flour as necessary to stop the dough from sticking
- 18
After a bout 10 - 15 slap and folds, the dough will look much smoother and stronger
- 19
Place this in a lightly oiled/greased bowl
- 20
Cover and leave in a warm place to bulk
- 21
We are looking for a risen/grown dough ( about 1.5 the original size)
- 22
Roughly takes about 3 - 3.5 hours at 90 °F (32 °C)
- 23
If you want to bake on the same day leave to bulk until doubled in size ( roughly 4- 4.5 hours in total) and continue from dividing onward
- 24
I am retarding my dough so, punch down the dough and round up form a dough ball
- 25
Place in the same bowl, cover tightly and place in the refrigerator for several hours ( 10 - 18) The less time the less sourness
- 26
Read the post to know how to tweak retarding time
- 27
To make the rolls, get the retarded dough out and let it sit on the counter for 20- 30 minutes just until it softens a little, but still cold
- 28
Colder dough is easier to handle
- 29
Grease the baking dish and set aside ( I'm using a 8 by 8 dish)
- 30
Divide the dough into 9 equal pieces ( or 12 pieces if you want smaller rolls/using a bigger dish)
- 31
Round up the dough pieces to form tight balls ( check the video linked on the post)
- 32
Place in the dish. place them closer to each other, so when they rise, they will rise upwards instead of sideways. This is a great if you like great height and also keep the rolls softer
- 33
Now cover this (I place the whole dish inside a large plastic bag) and place in a warm,draft free place to proof
- 34
Roughly takes about 3 hours at 90 °F (32 °C) Always check to see if they have proofed because the timing may vary depending on your starter/temp etc
- 35
Check the images in the post above to see what proofed rolls look like
- 36
Preheat the oven to 350 °F (conventional) lightly egg wash and bake the rolls for about 20 minutes. Check to see if they are done and may be give them another 5-10 minutes if necessary
- 37
While they are being baked, make the syrup. Heat the coconut milk just to get rid of the row taste ( 1 minute) and take off the heat and add pineapple juice and powdered sugar and mix ( adjust this to your taste, add lime or lemon or more sugar to your taste)
- 38
Tops of the rolls should be a light golden brown, when baked.
- 39
Once done, remove from the oven and place on a wire rack
- 40
Bush the top generously with the soaking syrup and leave to cool. If you want to make sliders with it, you can skip the syrup
- 41
Serve warm or make sliders
Notes
The syrup could be tweaked to suit to your taste. You can also use a general sugar syrup or a lemon glaze instead. The glaze/syrup can be completely omitted too, especially if you want to make sliders with these rolls
Never Miss a Recipe
Get new recipes straight to your inbox.

Comments
Loading comments…