Sourdough baguettes

Jump to recipe

A complete guide to crusty homemade sourdough baguettes!

I was on a mission to finding the secret or holly grail to making perfect sourdough baguette at home. In a bakery, this would be a no big deal with all the state-of-the-art mixers, proofers and ovens. But it can be quite challenging at home.

baguettes
open crumb and crispy crust

“This post may contain affiliate links and as an Amazon Associate I earn a small commission from qualifying purchases, at no additional cost to you. I only recommend products I would use myself and all opinions expressed here are my own”


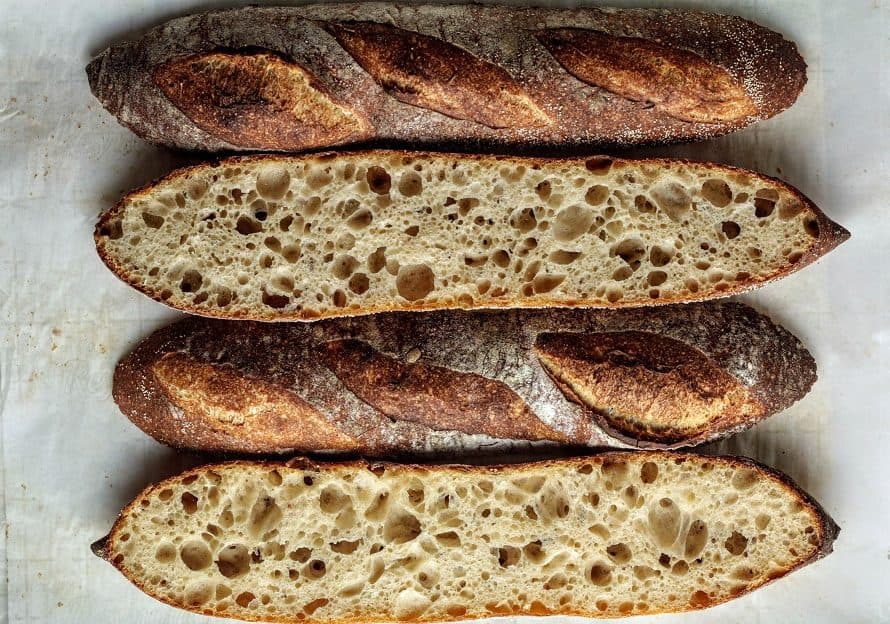
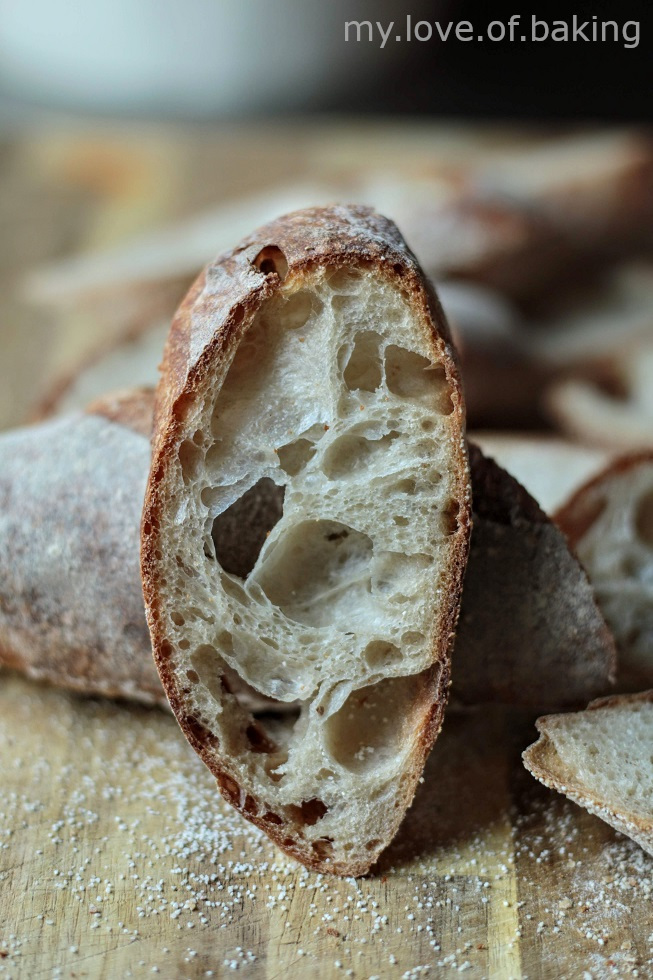
First of all, a baguette is nothing but a type of bread in the form of a long stick. The main reason for shaping the dough into a long stick is to get more of the crust. Baguettes are usually broken by hand rather than sliced and served with stews. If not they are split lengthwise used to make sandwiches. There are a few characteristics to a baguette:

  • long stick like shape
  • Crusty exterior
  • Very open crumb
baguettes
Open airy crumb/ sliced length wise

So in-order to achieve the above, we need to make sure to do the following;

  • Shaping/molding to create tension
  • Use steam while baking
  • a higher hydration ( above 70% is recommended)

You can use a basic bread recipe and turn it into a baguette. The only differences are in retarding and shaping. It is best to let the dough retard as a bulk. If you shape the baguettes and try to retard, they tend to lose their shape and sometimes, become too wet or soft to handle. This makes it harder to score and transfer to the oven. So the best practice is to bulk retard the dough and shape prior to baking.

About the flour

Notice I am using strong bread flour meaning the flour has a higher gluten percentage than the regular bread flour

strong bread flour – 13-14%
bread flour – 12%
All purpose – 10-11%

The more gluten in the flour, the stronger the dough will be. If you are not sure about the gluten % or are using regular bread flour, I suggest reducing the hydration until you are confident enough to handle a high hydration dough. Instead of 200g water may be use 180g -190g and see how it goes.
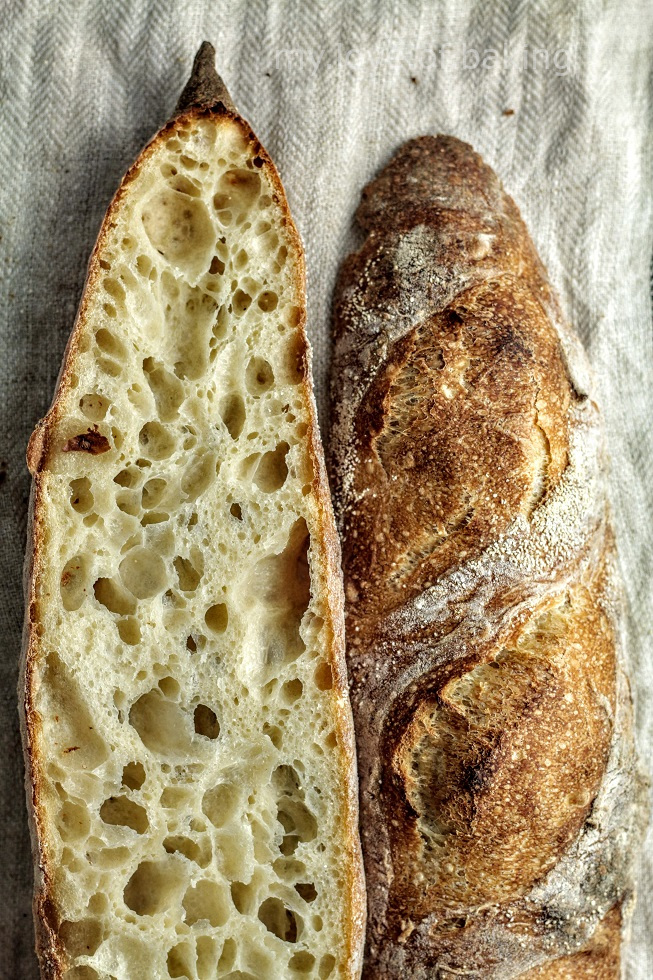
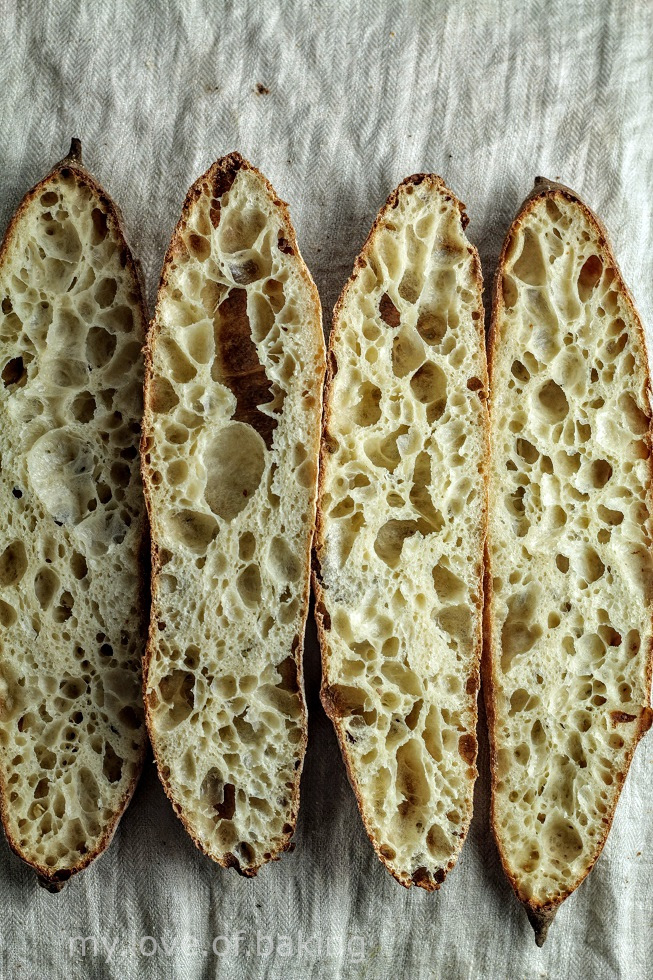
The high hydration helps with a chewier texture. Once you are used to the process, try increasing the water content in the recipe.

baguettes
open crumb/ sliced

I have figured out, with time, the less you knead the dough, the better. Gluten is developed over time. And we will only use stretch and folds at intervals to create the strength. This will require no mixer at all.

With all the basic sorted, lets get to the steps

Starter

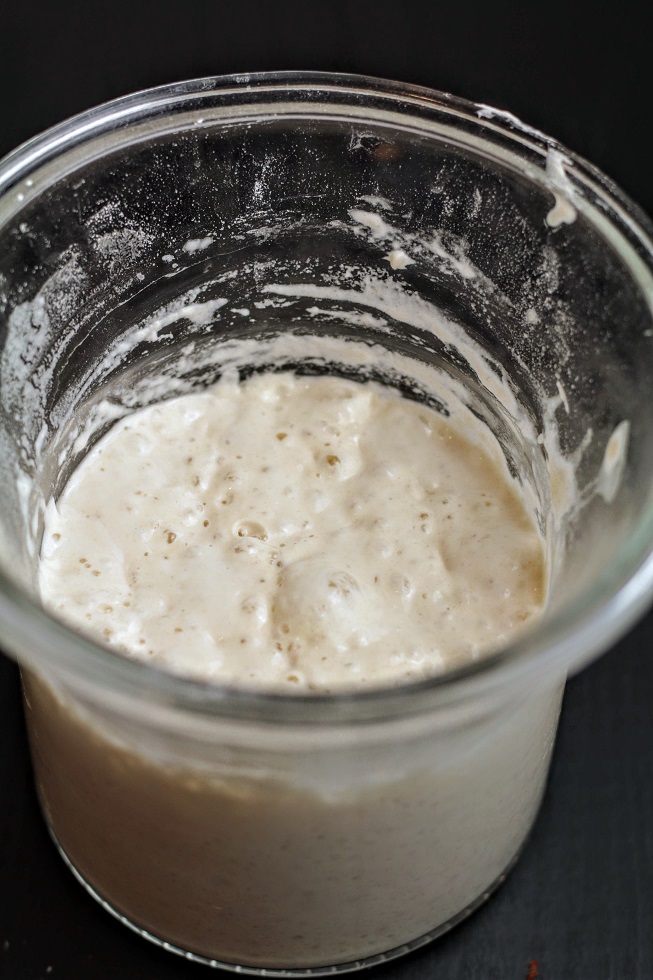
A first step is to get the starter ready. Feed the starter 6-7 hours before making the bread. Use a 100 % starter, meaning 1 part water to 1 part flour to feed the culture.

e.g: 50 g flour, 50 g water to feed 1 tsp starter

This is how my ripe start looked like at it’s peak

More about starter

Autolysis

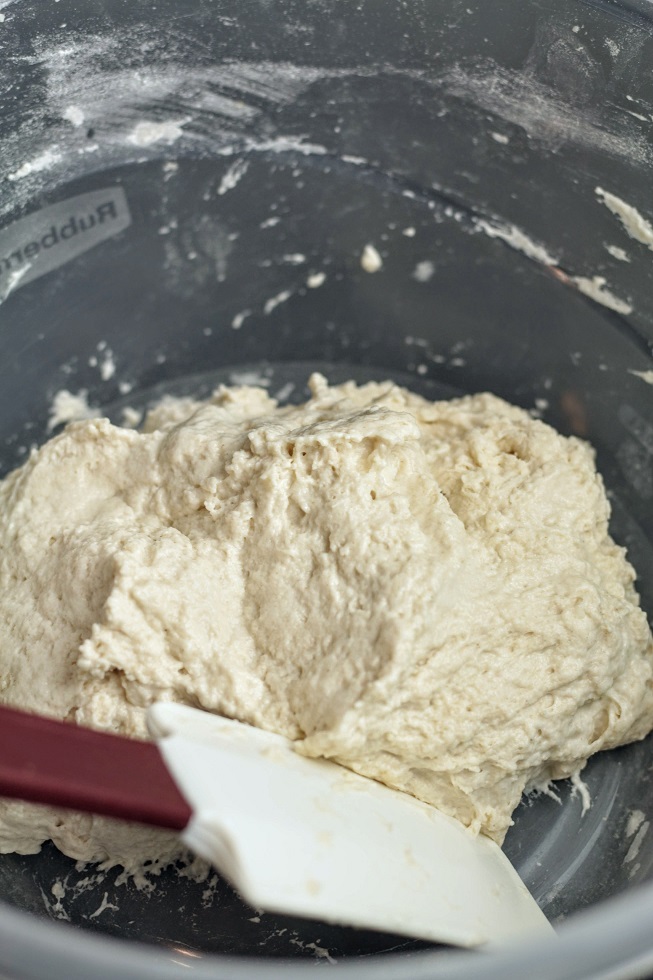
Mix the flour, water (leave 3 tbsp of water for later) and starter in a large plastic bowl. Mix only to combine everything just like shown in the picture. Now close the lid and leave for about an hour to autolyze.

Gluten will be developed during this time, without our intervention

Adding salt

After about an hour, add the salt. Dissolve the salt in the left out water and add to the dough. Mix until a smooth dough is formed. Use slap & fold as this is a high hydrated dough.

Place in the plastic bowl, cover and leave to rest for 45 minutes until the first stretch and fold or coil fold.

we will do 3 coil folds/stretch & folds during bulk

Stretch & fold or coil fold

Give a stretch and folds (coil fold) at 45 minutes and repeat two more at 45 minute intervals. Be gentle with folding..check videos

With every fold, the dough will start to feel more elastic and stronger. At the end of 3rd fold, rest the dough for about 2 hours .

Retardation
Then, cover with a well-fitted lid and refrigerate for several hours/ overnight

Final bulk

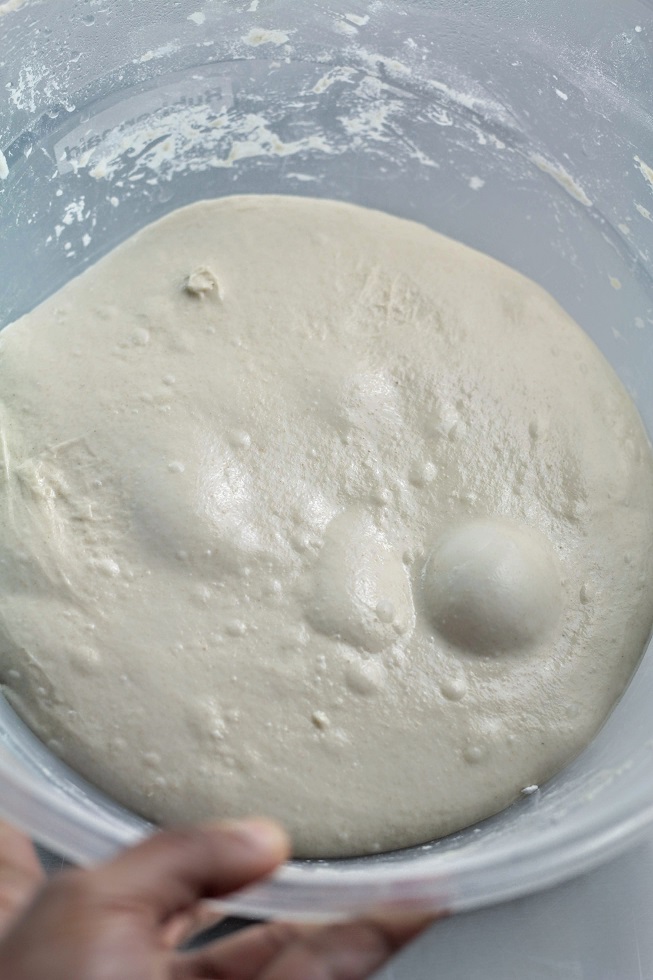
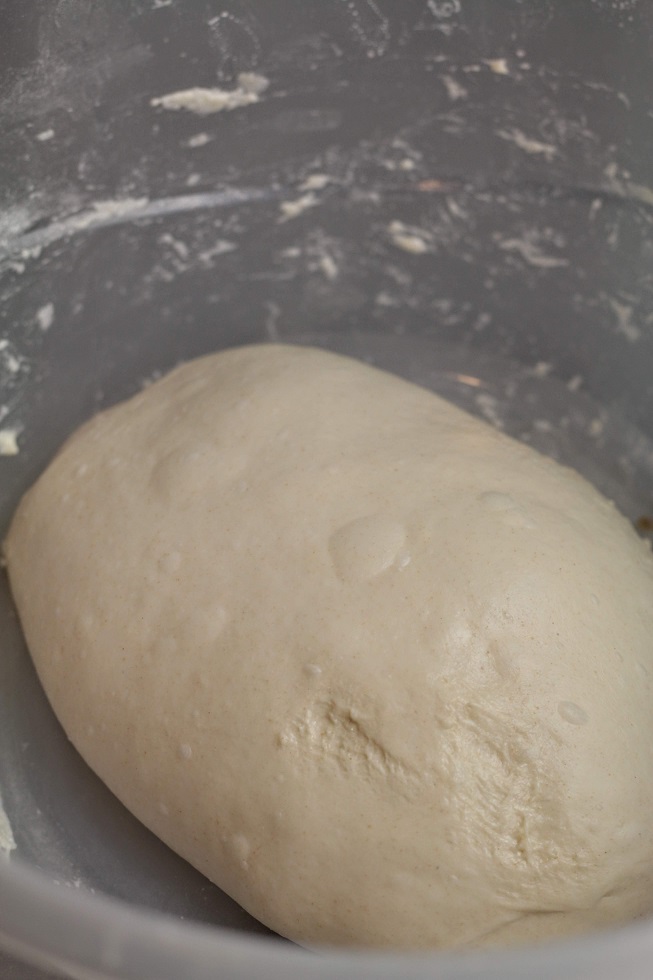
On the following day, take out the dough and leave at room temperature for about 4-5 hours, until you start to see air bubbles and the dough is risen considerably.

Pre-shape 1

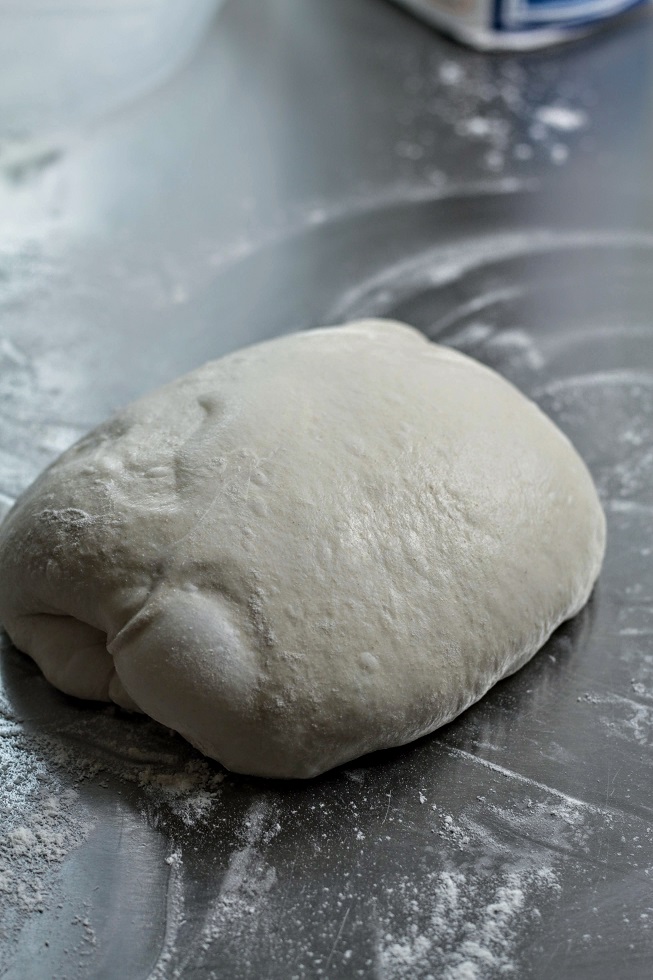
Tip the dough slowly on to a floured surface and form a dough ball, without knocking out too much air. The dough should be wobbly and full of air pockets. let this rest for about 5-10 minutes.

This step will make it easier to handle the dough when you try to divide and pre-shape

Pre-shape 2

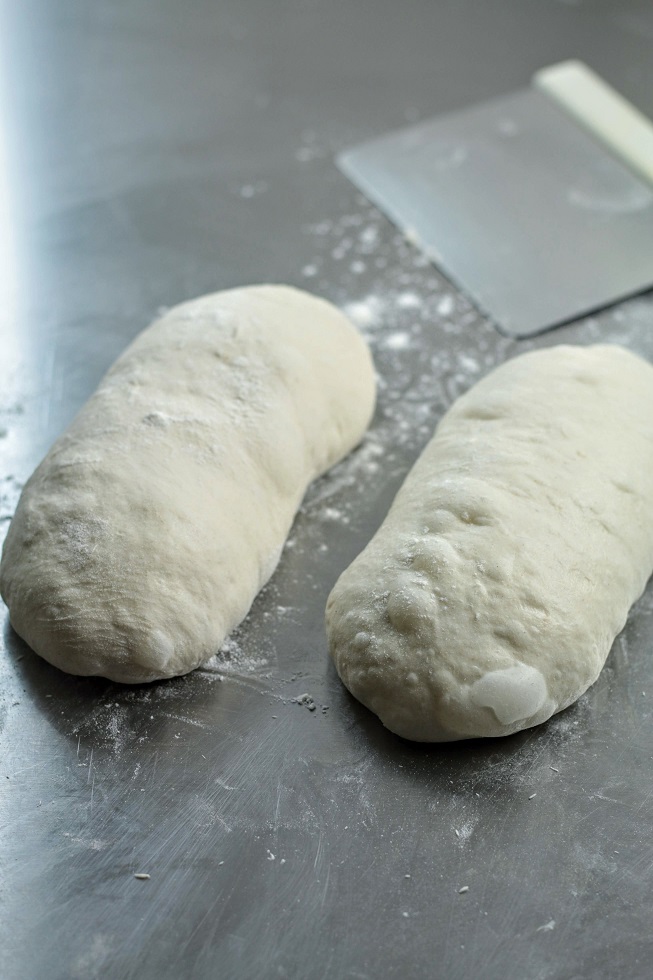
This is important to create the necessary stretch of the outer skin. Divide the dough in to two pieces, and shape each into a log shape.

Cover with a light dusting of flour and leave uncovered for about 30 minutes to rest.

Cloth/couche

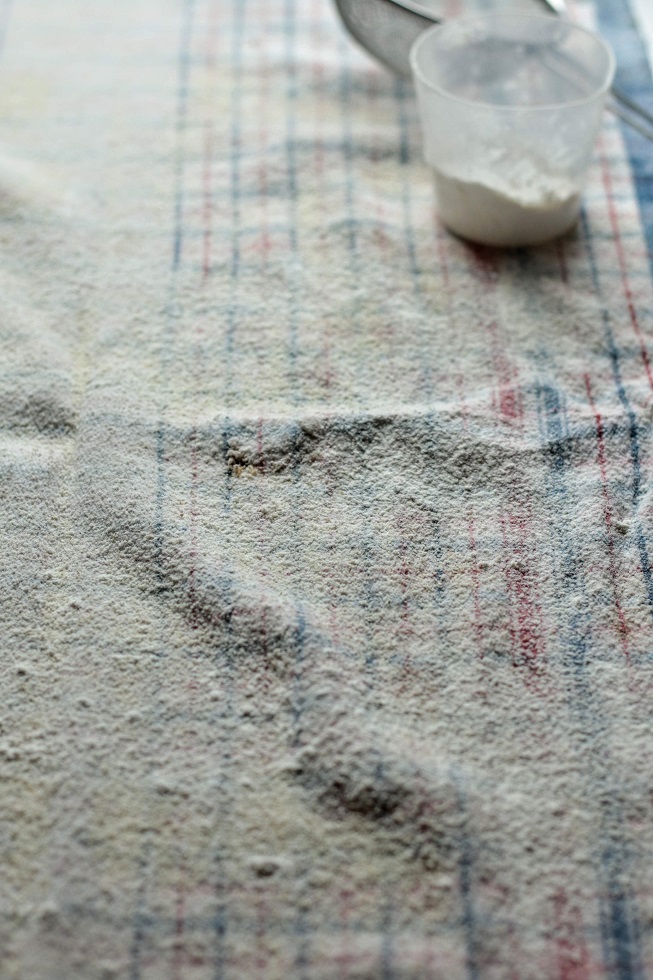
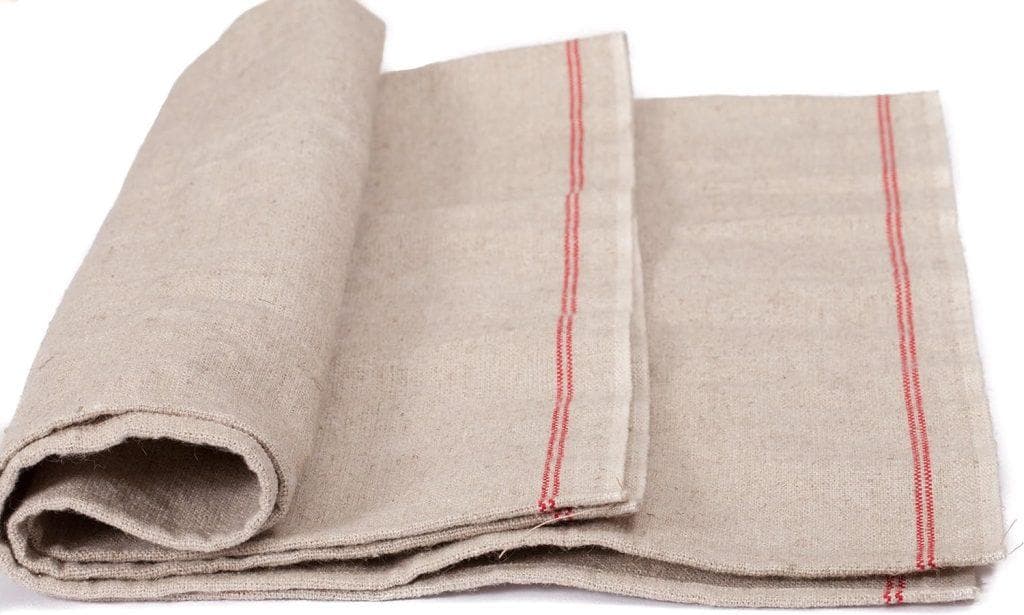
Traditionally a couche is used for this purpose. But you can substitute this with a thick clean tea towel. Dust it with flour and semolina generously.

This is where we are going to proof the baguettes

Shaping

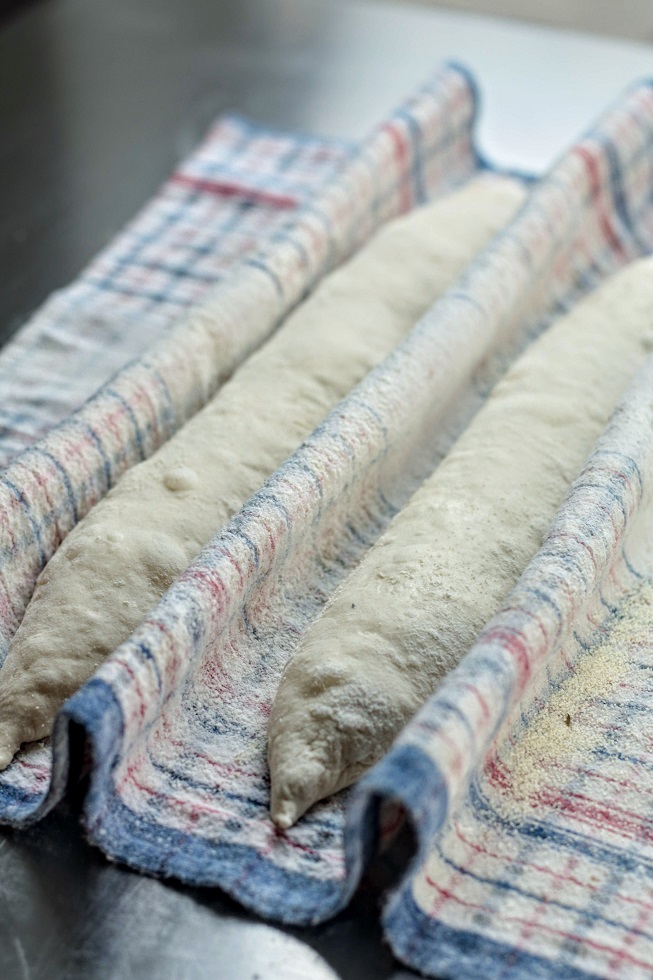
Shape the dough into baguettes and place on the prepared tea towel. Loosely cover and let these proof for about an hour or 1 1/2 hours. Preheat the oven in the meantime.

Check the video attached below for shaping or this one here

scoring

Scoring

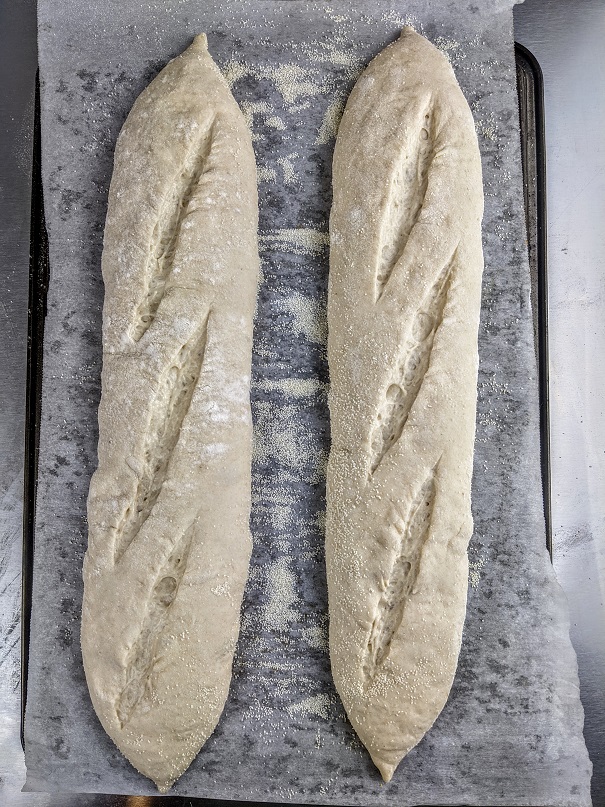
Transfer the proofed baguettes on to a peel or on to a tray lined with parchment as shown in the picture.

Dust the baguettes with a little flour and score the top using sharp blade.

Once the oven is ready place in the oven, on the pizza stone/skillet along with the parchment and bake according to instructions below.

You can also choose to use a baguette tray, if handling the dough is difficult. I prefer to use the stone directly as it transmit heat directly to the dough.

Steam

This is what I use to generate steam. A bread loaf pan with a tea towel tucked in. Pour boiling water until tea towel is covered and place this during the last few minutes of preheating.

Caution! Be extra careful when you open the oven door to place the baguettes in. There will be a lot of steam gushing out!

  • Preheating and baking instructions
  • Get a oven thermometer, this is your best friend. Place it in the oven.
  • Place a pizza stone or a large enough cast iron skillet on a rack placed at the top half of the oven
  • Preheat oven. I had to set digital display to 520 F and heat for 45 minutes to get to 500F on the oven thermometer inside
  • Get a bread pan, lay a tea towel and fill it with boiling water(check image above)
  • Place this pan in the oven on a lower rack during the last few minutes of the preheating
  • Let temperature reset, if it dropped when you opened the door
  • Be careful when you open the door next, the oven will be full of hot steam, waiting to be released
  • Transfer the baguettes on to a peel
  • If you don’t have a peel, place a parchment paper on the back of a cookie sheet or a large tray and use this to transfer baguettes to oven, along with the parchment
  • Score the baguettes while on the peel/parchment
  • Place the baguettes in the oven on the pizza stone and close the door
  • Temp will plummet right down (450F on thermometer) but that’s okay, it will come back up to 475 F. Maintain at 475 F.
  • Keep an eye and bake at 475 F for 15 minutes
  • Then reduce the internal oven temperature to 450 F(thermometer will read something around 450 – 430)
  • Remove steam and bake for another 12 minutes
  • When you remove the stream, the temperature will drop, so keep an eye and adjust accordingly
  • Then, switch the oven off and bake for a further 10 minutes, with the residual heat

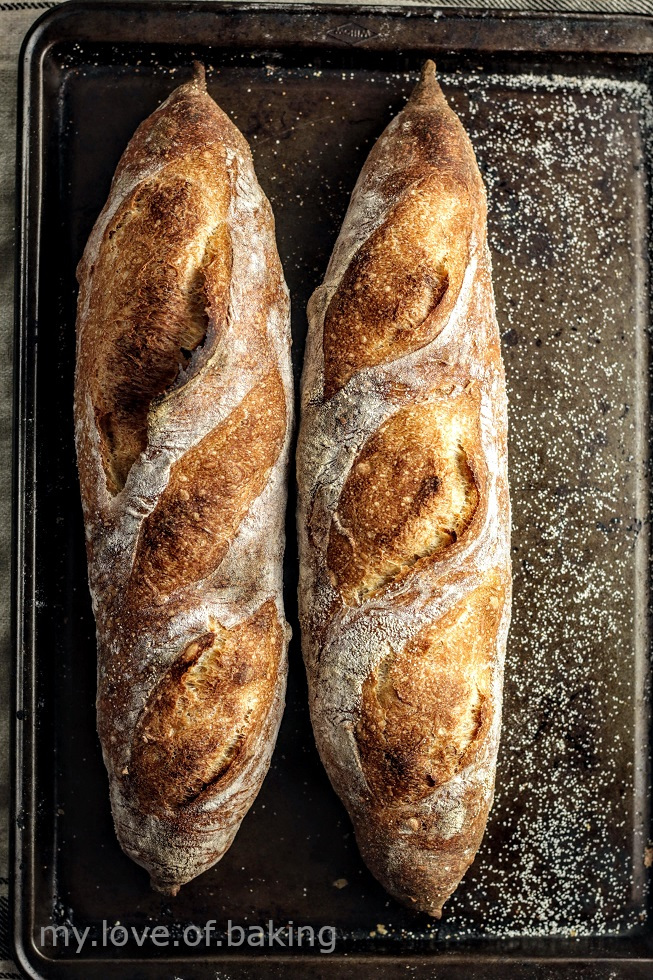
Cool baguettes on a wire rack.

baguettes
Baked baguettes

There you have it. This is everything I have learnt and I hope you will find answers to you questions/problems in this post. When it comes to baguettes, the recipe is only 20 % of the whole process. It is the timing, dough consistency, bulk proofing, shaping and most importantly baking is what matters most.

baguette
even crust on the outside

“This post may contain affiliate links and as an Amazon Associate I earn a small commission from qualifying purchases, at no additional cost to you. I only recommend products I would use myself and all opinions expressed here are my own”

Following is a simple recipe for two baguettes which I used for experiments. Once you have mastered the technique, feel free change the recipe and try something different!

You may also like

41 comments

  1. Hi, I’ve been baking sourdough w my same starter for 5+ years, developed my own recipe,etc. this time around I tweaked it with more liquid and used your baguette technique. The best hands down. Thank you!!

  2. Thanks for all the information. I started making the baguettes yesterday. I work until late so after the s & f’s I put the dough in the fridge for roughly 8 hrs, no activity. Took out of fridge and left for roughly 7 hrs until doubled in size. Followed the rest of your guide but placed baguettes in a baguette tray.
    Absolutely amazing!
    Very satisfied as I have ‘grown’ my own sourdough starter over the past 3 months and it is a very happy sourdough starter.
    What better satisfaction than making your own sourdough starter and producing great baguettes with nothing but the starter, flour, water, time and patience.
    Thanks again

    1. That is wonderful to hear. You should totally own it! Excellent execution.
      Sourdough bread making is very very satisfying, couldn’t agree more!!! 🙂

  3. I baked your sourdough boule yesterday and loved the result, so I decided to start on these baguettes. Haven’t tasted them yet, but baked today. Look golden and smell great crackling away as they cool. The Boule came out great with just my starter, but wimped out on these baguettes and added a small amount of instant yeast as insurance.

    Question though… My supply of bread flour is getting low and KA is on back-order! Any tips on subbing AP or recommend recipes that work best with AP, fine semolina, or Italian 00?

    Thank you for the great pics and instructional videos! Love the fact you demonstrate the techniques without a lot of chatter!

    1. Thanks. It’s great to hear you had success!
      Running out of bread flour is a real problem isn’t it?
      Depending on where you live, try to contact a local miller, that’s what we do here in Seattle.
      I haven’t got any recipe for using other flour types, but I mix all purpose flour with bread flour and reduce water to achieve great results.
      You can of course make bread with all purpose only, but go low on hydration (60-65).
      If you are on Instagram @theflourfloozy had some great recipes for all purpose flour. Check her out!

  4. Hi, gave the baguette recipe a go, but found the dough to be very weak( soft and un-formable ) I am wondering if it is because I used organic AP flour. I can’t find bread flour anywhere these days!!

    1. Yes. This recipe use Strong bread flour which is very high in gluten and are very good at absorbing moisture.
      If you wan to use AP flour, then go low on the water use 60% – 70% water and give an extra fold or two during the bulk to strengthen the dough.

  5. I tried making these last night into the morning. Everything started out fine, the dough looked beautiful. It proofed overnight for 9 hours. By the morning it had already grown a lot with plenty of bubbles. I left it on the counter for another 1 1/2 and it kept rising, almost going over the sides of my container so I started with the pre Shaping process. The dough was so wet I couldn’t handle it. I managed the preshape but by the time I got to the final shape I couldn’t even make a baguette. I did you bread flour and a very active starter. Could it have over proofed??

    1. “It proofed overnight for 9 hours” was this in the refrigerator? because, usually dough doesn’t grow much while retarding.

  6. Yes, in the refrigerator. The dough was about half way up the container when I put it in and by the morning it was to the top

    1. If the dough was halfway up, even before you put it in, yes it has over proofed.
      Check my picture next to Retardation, that’s what we are looking for before going into the fridge.
      If your room temperature is high then you have to cut down on bulking/proofing time. The best way is to judge by looking at your dough ( that’s why I post pictures of every stage)
      Hope this will help

    1. Ahh that makes sense. Sorry your dough is ruined, but you can make a focaccia or a ciabatta with that over-proofed sticky dough 🙂

  7. Hey! Thanks a lot for the recipe planning to make it tomorrow however I have been wondering if it possible to skip the cold proofing and bake it the same day? I know it will effect the taste of the bread but is it possible? Thanks a lot!

    1. Yes you can skip the retardation. Give another extra hour or two may be for the bulk and then you can go straight to pre-shape, shape, proof and bake

    2. Wow. Delicious. I had a very soft dough and had to add a bit more flour. Still had to prop up the shaped baguettes with tin foil rolled into logs. My bread has a tighter crumb but is yummy. Thanks for very precise instructions perfect for a novice.

      1. You are welcome! Glad you loved the taste! It takes time to learn to handle wet dough, but its worth it!

  8. Your instructions are spot on for me. I made these last weekend and my only problem was the bake. My oven was too hot so I need to dial that in. I read somewhere else not to be afraid of using flour to keep wet dough from sticking during turnout and shaping, as long as you are careful not to incorporate it. I’m excited for this weekends result! Thank you.

    1. Glad it worked out so well for you. Yes that’s correct about flour. With the oven temperature; there is always an adjustment in there as ovens are different even if they are the same brand.
      So it takes a two or three rounds usually for me to settle down on a setting. But I guess you have that figured out, well done! Good luck with the bake! 🙂

  9. I usualy use a large oval pyrex bowl for baking my bread (it has a lid which adjusts perfectly so no steam is lost). Could I use it for the baguettes instead of using the steam method?

    1. I am not sure about that. How do you get steam inside the pyrex? If this has worked with bread, then it should.
      Only one way to know, that is to give it a try.

      1. Oh, I mean the moisture from the same dough, I use the pyrex as a dutch oven. The only thing I have to be careful about is that as it´s transparent my bread bottoms get burned easily, so I usually place it on another tray or use parchment paper.

  10. Hi Vindi! First time ever making sourdough baguettes completely with my own starter. I enjoyed the process, felt I would like more rise but had open crumb and delicious chewy sour taste! So good toasted with butter. I had a big air pocket inside the loaf that ran the length of my baguette. Any feedback greatly appreciated!

    1. First of all..well done! 🙂
      This recipe is aiming for an open crumb and if you want more definition on the outside, consider going low on the hydration.
      Big air pockets are common in high-hydration loaves. However, make sure you de-gas before you shape. Check my videos on shaping baguettes. Gently docking the dough with fingers or even slapping the dough on the table a couple of times, before you shape, will get rid of excess air and will help get a more even open crumb.
      Hope this helps!
      Cheers!

  11. While the flavor of the bread I made was really good, the outside crust was so hard. I am not sure what I did wrong. Any suggestions? The inside of the bread was nice and soft with big air pockets.

    1. May I ask what flour you used? Refined white flour yield a softer crust.
      Dense crust is probably due one of the following;
      – under proofed (when the bread proofs, the outer layer stretches resulting in a thin crust)
      – poor molding (you have to create tension while molding to crate a thin skin)
      – oven not hot enough (a hot oven promotes a nice oven spring which helps in getting a thinner, crispier crust)
      – baked for too long at too high temperature (you should start with a hot oven and reduce temperature during the second half)

      see if any of the above could have been the case,
      Hope this helps.
      Cheers!

  12. I have made thee baguettes 4-5 times now. They always come out great. The last time, I doubled the recipe and make 1 large loaf and it was awesome. Your process makes so much sense that it is easy to make little adjustments for different style loaves. Thanks for putting it out there.

    1. Wonderful! Yes this dough can be used to make pizza or even focaccia.
      I agree, its the process not the recipe 🙂
      Cheers!

  13. Hi Vinci, I tried twice your recipe and they turned out to be delicious, even my husband (he’s French!) said they are good! Thank you very much.
    Just one thing I can’t really do well, it’s the scoring. I used a scoring knife but I struggled to make a score like yours in the picture before it goes into the oven. Mine doesn’t show the inside, it just makes a thin trace of line. So when in the oven it doesn’t open up, so the dough doesn’t rise so much. When it’s baked, inside is really airy and tastes good. Do you have any advice for this?

    1. That’s great to here. I’m glad you loved it so much.
      If the bread is airy and taste good, that means you have nailed it. Scoring takes some practice and time to perfect. We score the bread so it has some room to expand without tearing. If your bread didn’t want to expand in the oven, the scoring may not open up. This is either due to slight over proofing, oven being not hot enough or may be shaping issues. When shaping try to create tension in the outer skin of the dough so that when the bread expand in the oven it stretches to open up the scoring. Because this is a high hydration recipe, this might be difficult. Try reducing the water % slightly and you’ll be able to score with ease too.
      Hope this helps!

  14. Hello again! Thank you for the advice. I reduced water to 185g and it turned out really great. It was easier to shape and the scoring opened up beautifully. I was really happy and so was my family. One baguette was gone as soon as they came out of the oven. Thank you again for this wonderful recipe 🙂

    1. That’s wonderful! Good job 😀
      I’m so happy your family loved these, yes crusty baguettes are hard to resist..haha

      Cheers

  15. Hey Vindi,
    I had a question about this baguette dough…
    When I bake a batard/boule of sourdough, I mix the dough, bulk ferment it 3-4 hours on the counter, s&f a few times during that time period, shape it, put it in the fridge overnight in a proofing basket, and bake it off in the morning. I feel like that’s a pretty standard approach a lot of bakers employ.
    So why does this dough need that 4-5 hours after it comes out of the fridge? Is it because you’ll be shaping it again? If you shaped the baguettes after the bulk ferment, and put them in the fridge, could you bake straight from the fridge in the morning?

    1. That standard practice is what I do with my batards too. But with baguettes I find the shape does not retain overnight in the fridge and also they are being placed on metal trays which inhibits proofing and sometimes forms a dry skin. This is why I prefer to continue to ferment the day on baking, which gives better results (open crumb). having said that, this is how I do it and do it differently when I work in a bakery because the setup at home is different. You can try and adopt to a way that works for you. As long as there is sufficient, gluten development and fermentation…

    1. Hi Gil,
      200/250 = 0.8 * 100 = 80%
      When calculating hydration in bakers % we don’t consider the levain or starter hydration. May be you included that too? I’m just guessing.

      Also, if you are not using high-gluten bread flour consider using 70-75% hydration so the dough will be easier to handle

Leave a Reply

Your email address will not be published. Required fields are marked *


The reCAPTCHA verification period has expired. Please reload the page.